Rules to Better TFS Customization - 8 Rules
If you still need help, visit Application Lifecycle Management and book in a consultant.
TFS 2012 includes 3 built-in process templates:
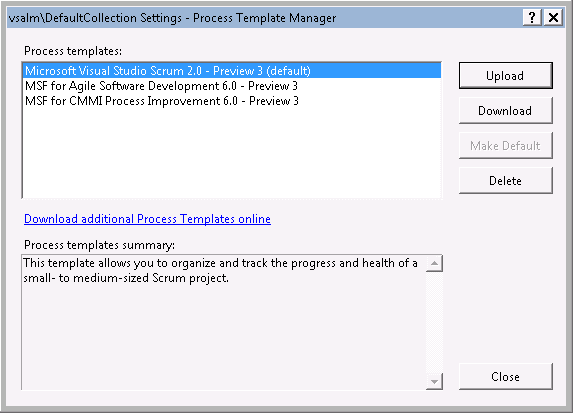 Figure: built-in process templates in TFS 2012Instead of starting from scratch, you should always choose one of these built-in templates to do your own customization. It will depend on the target process for you to choose which one, for small and simple process, Scrum and Agile templates are recommended; for formal and complex process, choose the CMMI template.
 Using an existing process template will save you a lot of time because
- It has the structure setup already, all you need to do is to make modifications and upload the template back to the server again.
- All the built-in reports could be used as a template for your customization, this will save you a lot of time from creating a new report.
For Azure DevOps Server (and old TFS servers) Note: If using Azure DevOps (cloud) then you have no method of tracking changes to the Process Template.
The customized process template is a very important asset for your team, you should use Source Control to store the work-in-progress template so you can track the changes and avoid mistakes.
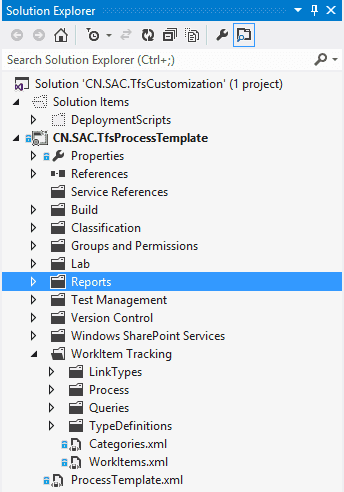
Figure: customized process template in source control You should also keep a version history log in ProcessTemplate.xml so you can track the deployed version easily.
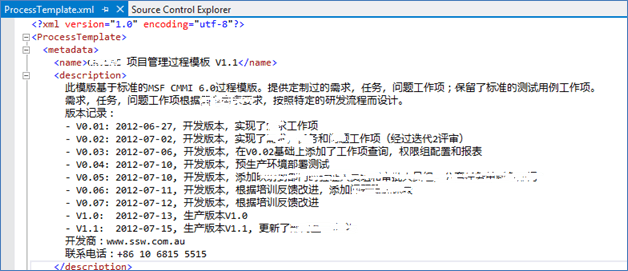
Figure: ProcessTemplate.xml with version history log Global List could be referenced in multiple work item types, if you are using the same list in different places and want to keep the drop down items consistent, global list is the best practice.
<FIELD name="Discipline" refname="Microsoft.VSTS.Common.Discipline" type="String"> <font face="Verdana, sans-serif">  </font><HELPTEXT>The discipline to which the task belongs</HELPTEXT> <ALLOWEDVALUES expanditems="true"> <LISTITEM value="Development" /> <LISTITEM value="Test" /> <LISTITEM value="Project Management" /> <LISTITEM value="Requirements" /> <LISTITEM value="Architecture" /> <LISTITEM value="Release Management" /> </ALLOWEDVALUES> </FIELD>Figure: Bad example – Embed the list items in work item type definition
<?xml
version="1.0" encoding="utf-8"?>
<gl:GLOBALLISTS  xmlns:gl="http://schemas.microsoft.com/VisualStudio/2005/workitemtracking/globallists">
  <GLOBALLIST name="Disciplines">
    <LISTITEM value="Architecture" />
    <LISTITEM value="Requirements" />
    <LISTITEM value="Development" />
    <LISTITEM value="Release Management" />
    <LISTITEM value="Project Management" />
    <LISTITEM value="Test" />
  </GLOBALLIST>
</gl:GLOBALLISTS>
Figure: Good Example - Save above as
GlobalList.xml file
<FIELD
name="Discipline"
refname="Microsoft.VSTS.Common.Discipline"
type="String">
  <HELPTEXT>The discipline to which the task belongs</HELPTEXT>
  <ALLOWEDVALUES>
    <GLOBALLIST name="Disciplines" />
  </ALLOWEDVALUES>
</FIELD>
Figure: Good example - Reference a global list in work item type definitionNote: Global list is defined at the Team Project Collection level and it needs to be uploaded before the process template could be uploaded
You will need to update your work item types very frequently once the customization process is started, make sure you have a script like below in your solution, this will help you to upload your process template quickly with one click, which make your development more efficient.
ECHO OFF
ECHO \*\*\*\*\*\*\*\*\*\*\*Importing new definitions\*\*\*\*\*\*\*\*\*\*\*\*\*\*\*\*\*\*\*\*\*\*\*\*\*\*\*\*\*\*\*
ECHO ON
witadmin importwitd /collection:http://%1:8080/tfs/%2 /p:%3 /f:"..\CN.SAC.TfsProcessTemplate\WorkItem Tracking\TypeDefinitions\Requirement.xml"
witadmin importwitd /collection:http://%1:8080/tfs/%2 /p:%3 /f:"..\CN.SAC.TfsProcessTemplate\WorkItem Tracking\TypeDefinitions\Task.xml"
witadmin importwitd /collection:http://%1:8080/tfs/%2 /p:%3 /f:"..\CN.SAC.TfsProcessTemplate\WorkItem Tracking\TypeDefinitions\Issue.xml"

ECHO OFF
ECHO \*\*\*\*\*\*\*\*\*\*\*Importing new definitions\*\*\*\*\*\*\*\*\*\*\*\*\*\*\*\*\*\*\*\*\*\*\*\*\*\*\*\*\*\*\*
ECHO ON
witadmin importwitd /collection:http://%1:8080/tfs/%2 /p:%3 /f:"..\CN.SAC.TfsProcessTemplate\WorkItem Tracking\TypeDefinitions\Requirement.xml"
witadmin importwitd /collection:http://%1:8080/tfs/%2 /p:%3 /f:"..\CN.SAC.TfsProcessTemplate\WorkItem Tracking\TypeDefinitions\Task.xml"
witadmin importwitd /collection:http://%1:8080/tfs/%2 /p:%3 /f:"..\CN.SAC.TfsProcessTemplate\WorkItem Tracking\TypeDefinitions\Issue.xml" Figure: quick
deployment script for process template – UpdateProcessTemplate.bat With above script, you can execute the command like below UpdateProcessTemplate.bat <serverAddress>
<collectionName> <projectName>
So, just one command, all of your customized work item types will be updated on the server.
Sometimes you will need to create duplicate work item types, e.g. a task work item may be clones as PlatformDepTask, SystemDepTask; both of these task work items are sharing the same fields, workflow or layouts, but they are configured to be accessible by different department or there is some other minor differences.
You should create a WIT template and use a place holder for the difference, e.g.
<WORKITEMTYPE name="xxxxDepNamexxxxTask">
  ...
</WORKITEMTYPE>
Figure: WIT template with a placeholdera
Then use the following PowerShell script to automatically clone the work item and replace the placeholder with actual text.
$original\_file = '..\WorkItem Tracking\TypeDefinitions\Task\_Template\_DONOTInstall.xml'

$destination\_file =  '..\WorkItem Tracking\TypeDefinitions\Task\_ PlatformDep.xml'
(Get-Content $original\_file) | Foreach-Object {
    $\_ -replace "xxxxDepNamexxxx", "PlatformDep"
    } | Set-Content $destination\_file -Encoding UTF8

$destination\_file =  '..\WorkItem Tracking\TypeDefinitions\Task\_SystemDep.xml'
(Get-Content $original\_file) | Foreach-Object {
   $\_ -replace "xxxxDepNamexxxx", "SystemDep"
   } | Set-Content $destination\_file -Encoding UTF8
Figure: PowerShell script to create duplicate WITs and replace the place holder with actual data
Note: if you are using non-English characters in your template, make sure you add
–Encoding UTF8otherwise you will have some encoding problems.The default WIT doesn’t control the valid drop down items in Assigned To filed, this will introduce unnecessary items to be shown in the list which will make your users confused, e.g. TFSBUILD, tfsBuildService should never be used to assign a job.
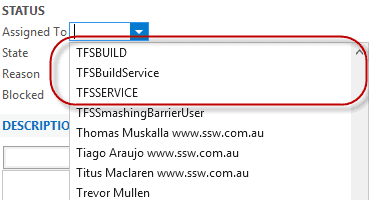 Figure: Bad Example – shown unnecessary values
You can add the following XML in the Assigned To filed definition to control the valid values:
<FIELD name="Assigned To" refname="System.AssignedTo" type="String" reportable="dimension" syncnamechanges="true"><ALLOWEXISTINGVALUE /><REQUIRED /><ALLOWEXISTINGVALUE /><VALIDUSER /><ALLOWEDVALUES expanditems="true" filteritems="excludegroups"><LISTITEM value="Active" /><LISTITEM value="[project]\xxxxDepNamexxxxGroup" /></ALLOWEDVALUES></FIELD>
Figure: Use ALLOWEDVALUES to control the values in Assigned to field
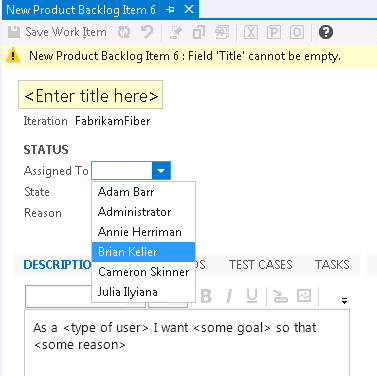 Figure: Good Example – shown necessary values
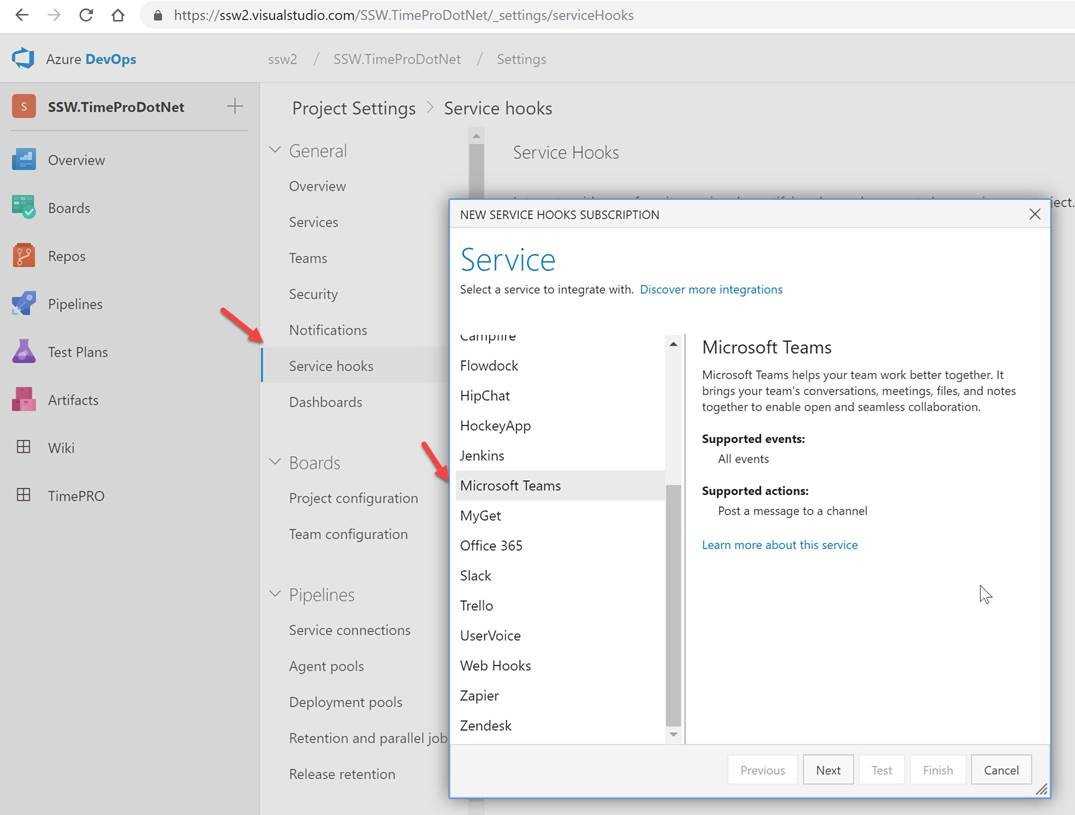
You can see details about your Azure DevOps Server (formerly known as TFS) projects directly in your Microsoft Teams channel. Examples of what you can monitor:
- Work item updates
- Pull requests
- Code commits
- Builds
- Release deployments and approvals
Also bring your Azure DevOps Services Kanban board directly into Microsoft Teams as a tab.
For more info, follow this link: https://docs.microsoft.com/en-us/azure/devops/service-hooks/services/teams?view=vsts
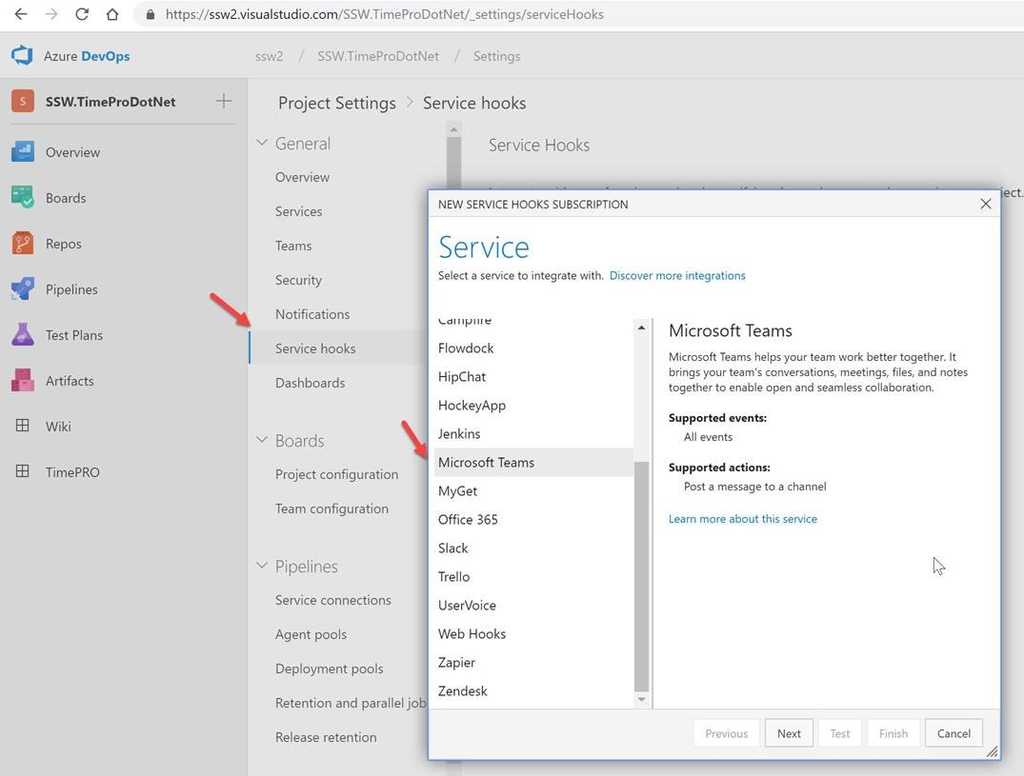
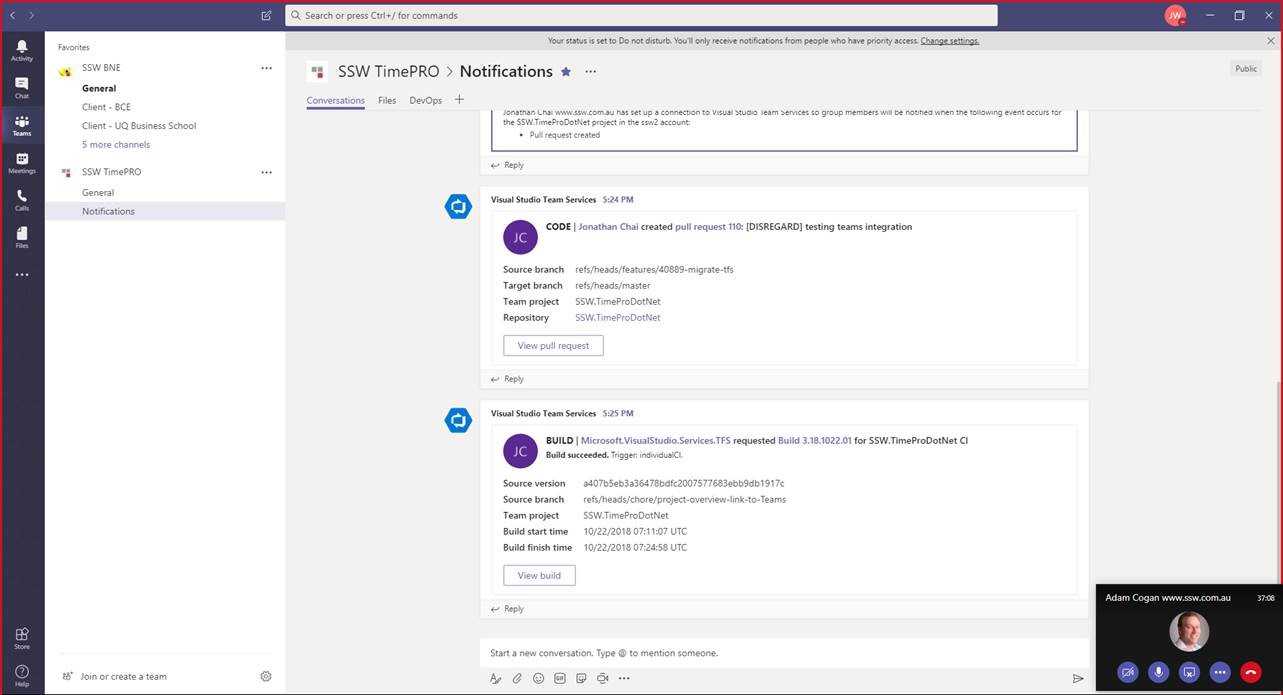
Figure: How to setup Azure DevOps Events on Microsoft Teams 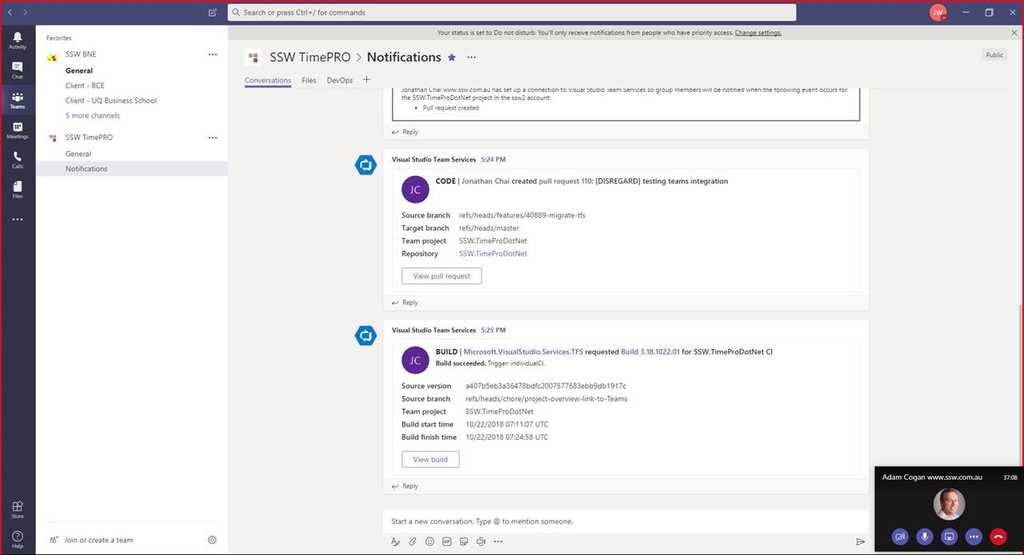
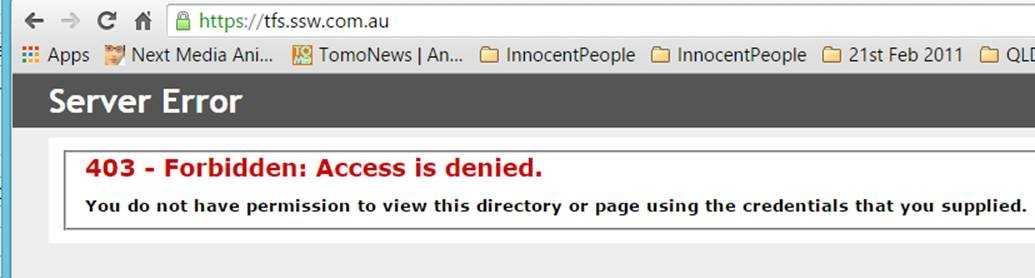
Figure: It's nice to be able to converse about the project and see notifications such as PR coming through Many clients that complain when they type: tfs.northwind.com ...and then see ‘Server Error 403 – Forbidden: Access is denied’
It is not a nice experience that in 2015 the out-of-the-box requirement is still to type "/tfs".

Figure: Bad example - A horrible first experience... did I get the URL wrong? Is the server down? So fix the nasty out-of-the-box experience.
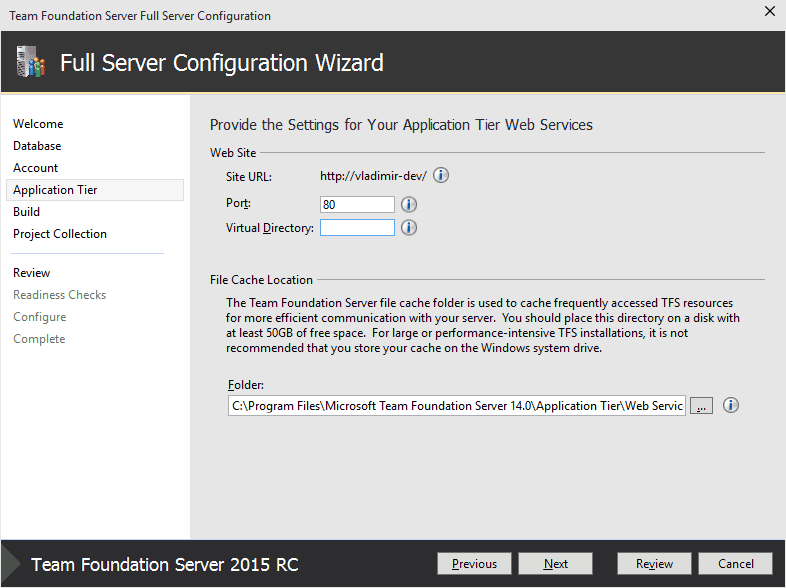
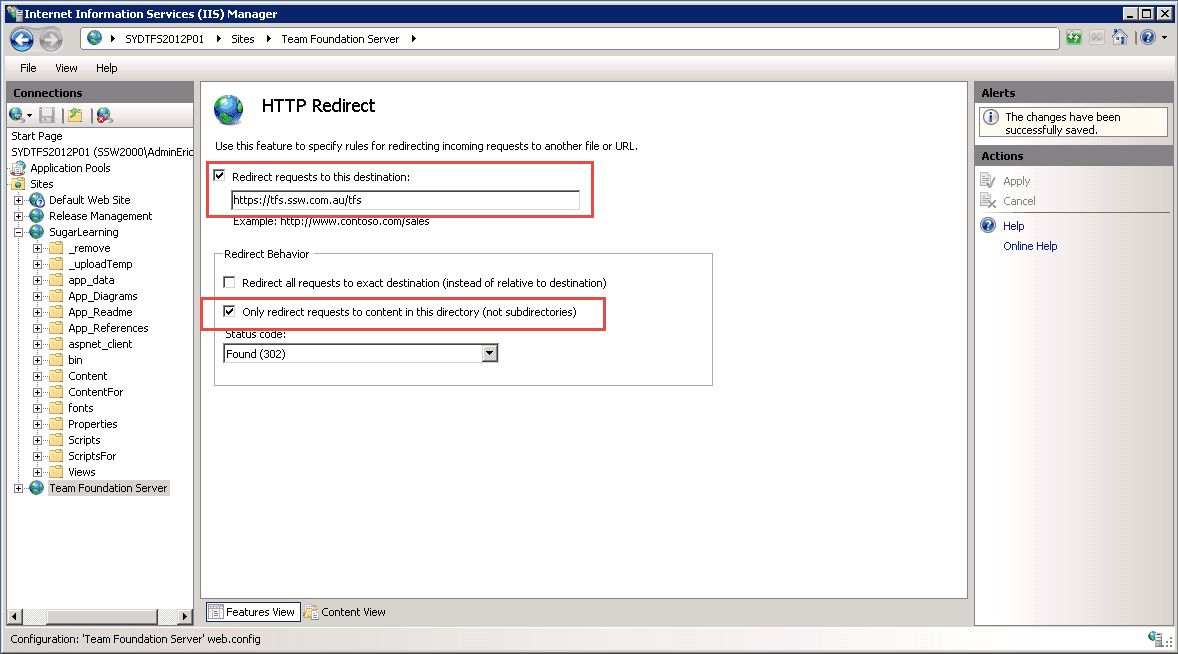
Figure: Option 1 – This is one way. Include some text to tell devs that they can remove the need for /tfs - on the Application Tier page specify port 80 and an empty Virtual Directory 
Figure: Option 2 – This is another way. In IIS add the redirect to remove the need to type “/tfs” (recommended)