
Do you know how to set up a Vue.js project?
Last updated by Zach Keeping [SSW] 10 months ago.See historyGetting started with a Vue.js project is easy. Here's how you can quickly get up and running:
create-vue (Recommended)
create-vue is the official and recommended tool for scaffolding a Vue.js project. It uses Vite (also from Vue creator Evan You) to help quickly and easily set up a Vue.js project to your specifications.
Note: This requires Node v16 or higher.
-
In your command line, run:
npm init vue@latest -
This will install and run create-vue. It will then prompt you for a project name and step you through a series of prompts for the features you wish to enable:
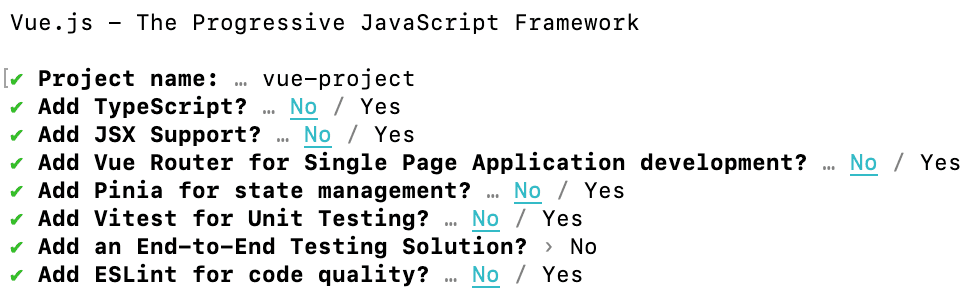
Figure: The options provided by create-vue for scaffolding a Vue.js project -
When this completes, you're all done! You will now have a Vue.js project set up in a folder matching the project name you set. To get started running a dev server, execute the following:
cd {{ PROJECT_NAME }}
npm install
npm run dev
Vue CLI (Not recommended for new projects)
Vue CLI is the official CLI toolchain for Vue.js development using Webpack. Previously, this was the recommended tool for scaffolding a Vue.js project but is now no longer supported, in favour of create-vue and Vite. Unless your project requires Webpack, it is recommended to use create-vue instead.
Note: This requires Node v8.6.0 or higher.
Scaffolding a project in Vue CLI takes just a few steps:
-
Install Vue CLI:
npm install -g @vue/cli -
Create a new project using "vue create":
vue create {{ PROJECT_NAME }} -
You will then be presented with a few options. Here you can choose to get up and running using default presets, or you can manually choose what features you want for your project:
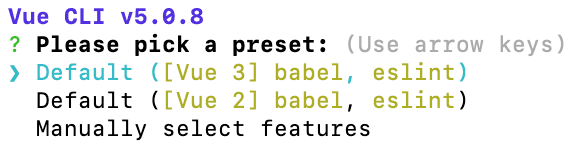
Figure: Top-level options when running "vue create" using Vue CLI 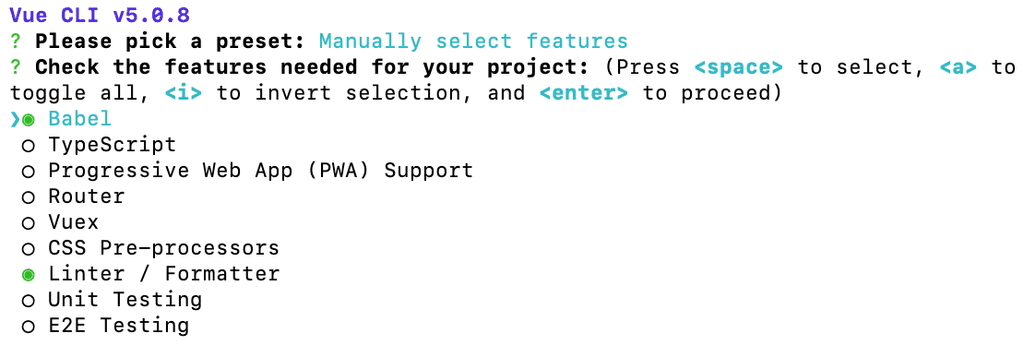
Figure: Manual feature selection instead of using a preset in Vue CLI -
Once you've selected your options and allowed it to complete, you'll now have a basic Vue.js project set up in a folder matching the project name you entered. You can get a dev server running by executing the following:
cd {{ PROJECT_NAME }}
npm run serve

