Rules to Better Angular - 23 Rules
Angular is everywhere.
There are two distinctive versions of Angular:
- AngularJS, this is v1, not getting any new features, and ends LTS support at the end of 2021
- Angular (or Angular 2+) which represents any version of Angular after 2.0 (which was a major rewrite).
This page is a set of rules and guidelines to get you up and running using Angular with the least pain possible.
Want to build an Angular application? Check SSW's Angular Consulting page.
A lot of these rules have originated from the Angular Superpowers Tour.
Angular and React have been the 2 dominant front-end technologies for the last few years. We have been running our Angular Superpowers course that entire time, and it is still amazing that every time we run the course, we sell out.
Of course, we update the course with every version, but it's still amazing because JavaScript frameworks have a reputation for being transitory. But these 2 frameworks have become entrenched in enterprises everywhere.
Here are the best collection of resources for Angular.

Figure: Download the Little Book of Angular Free Resources
- The official documentation - Angular.io
Run through the tutorial - SSW TV - Angular category
Training Courses $
Books
Free Events
- Angular Hack Day
- Your local JavaScript or Angular User Group - Find on Meetup
- The official documentation - Angular.io
If you want to get started with Angular, go to the Angular Setup guide.
The prerequisites are:
- Node.js and NPM (installed with Node.Js by default)
- Angular CLI
The best practice for creating an Angular project and components is to use the Angular CLI (command-line interface).
The Angular CLI is also used in the latest .NET Angular SPA template.Read Do you know that the ASP.NET Core SPA Template for Angular uses the Angular CLI?
Instructions for upgrading the Angular CLI of an existing project can be found on update.angular.io.
Getting errors?
If you get errors, follow instructions in the links:
Which IDE should I use for developing Angular applications?
We recommendVSCode. Read more on Do you know the best IDE for Angular?
Other tools to consider
In addition to the essential tools mentioned, there are several other useful browser extensions that can improve your development experience:
- Angular DevTools for Angular 12+ applications.
Angular DevTools helps to debug and profile Angular applications by visualizing the component structure, inspecting component properties, inputs, and outputs and running a performance profiler.
- Redux DevTools when using state management libraries like NgRx or NgXs.
Redux DevTools allows for inspection, monitoring, and manipulation of the state of an Angular application.
When developing Angular or React, there are lots of choices for code editors. The best experience by far is to use Visual Studio Code.
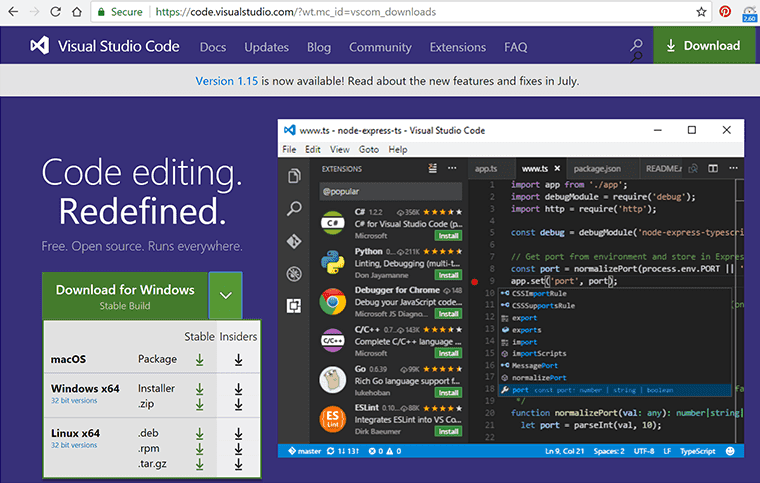
Figure: Good Example - Visual Studio Code is a free, lightweight IDE that runs on Windows, Linux and macOS. Visual Studio Code is the IDE of choice for many Angular developers and has lots of great extensions for Angular Many experienced teams are using Visual Studio for their C# backend and loving using Visual Studio Code for their Angular or React projects.
The recommended extension for Visual Studio Code is Angular Essentials from John Papa.
Angular Essentials is actually a meta-package that includes a list of great extensions for Angular Development – and this list may be updated in the future as more extensions become popular.
See https://github.com/johnpapa/vscode-angular-essentials.
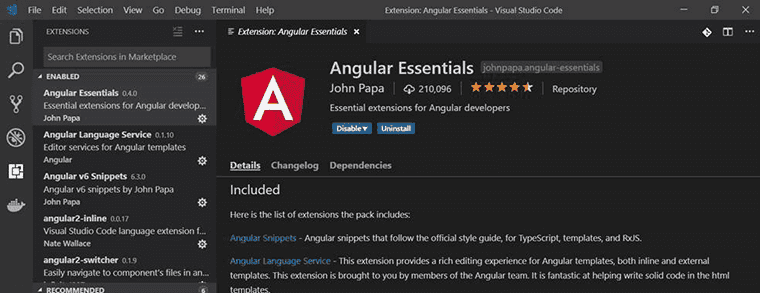
Figure: Good Example – the Angular Essentials extension will install a great suite of extensions to support Angular development You can find more extensions at Visual Studio | Marketplace.
Open in Visual Studio Code
This extension is for those times where you have a project open in Visual Studio and you want to be able to quickly open it in Visual Studio Code.
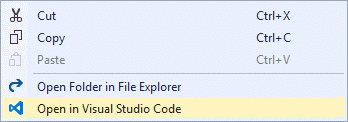
Figure: Get to Visual Studio Code quickly from within Visual Studio - Open in Visual Studio Code extension Angular.io is a great place to get started learning Angular, and since the Angular CLI is now an official Angular project, these docs now include using the CLI from the beginning.
The Quick Start and Tour of Heros Tutorial will teach you lots about Angular.
For an enterprise real-world project you should also consider:
- Whether your application will require the redux pattern
See Do you know to use ngrx on complex applications? - Do you need a UI framework?
See Do you know the best UI framework for Angular?
There are also several well-used templates that incorporate Angular and server-side tooling.
While these starters often include advanced functionality, we prefer to implement pure Angular CLI projects where possible because Angular updates frequently.. and when you are using someone else's template that incorporates Angular you are left with the options of waiting for them to update their template to the latest version of Angular, or working out how to do it yourself. This can often leave you with large amounts of work or be being several months behind the latest versions.
To learn how to build enterprise Angular applications check out Angular Dev Superpowers Tour.
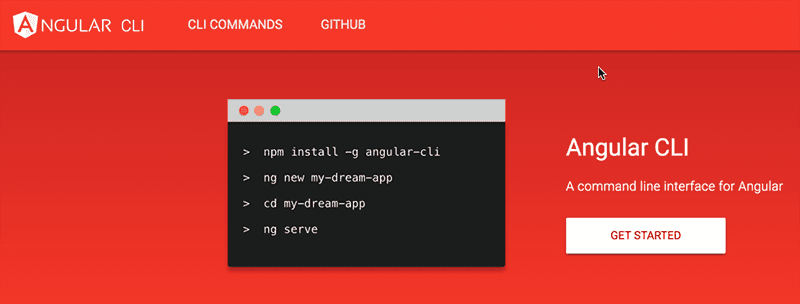
Figure: Good Example - The Angular CLI will create you a new Angular project with a single command, and that project will be set up with production build, unit testing, and end-to-end testing all configured. If you have very specific build requirements, the CLI also supports custom web pack builds - Whether your application will require the redux pattern
For .NET Developers only!
For many Angular solutions, a good practice is to keep your client-side and server-side code in separate projects.
- You get a clear separation of concerns
- You usually expect your server-side stack to outlive your client-side technologies
- You may plan to use your WebAPI with multiple user interfaces such as mobile or bots
- Easier to deploy your angular app to a CDN
For some solutions, it might be simpler to integrate your client-side and server-side into a single project – and with the SPA templates for ASP.Net Core, this has never been easier.
- A single project might make sense for a smaller, simpler solution
- There will be only one website to deploy to a single web server that will serve both angular and WebAPI sites
- The project can be built with a single build process
- This might be a good choice if you are looking to migrate an existing MVC website as you can host MVC pages and the Angular app under one site
- This approach is easier if you want to use Windows Authentication
- No CORS configuration required
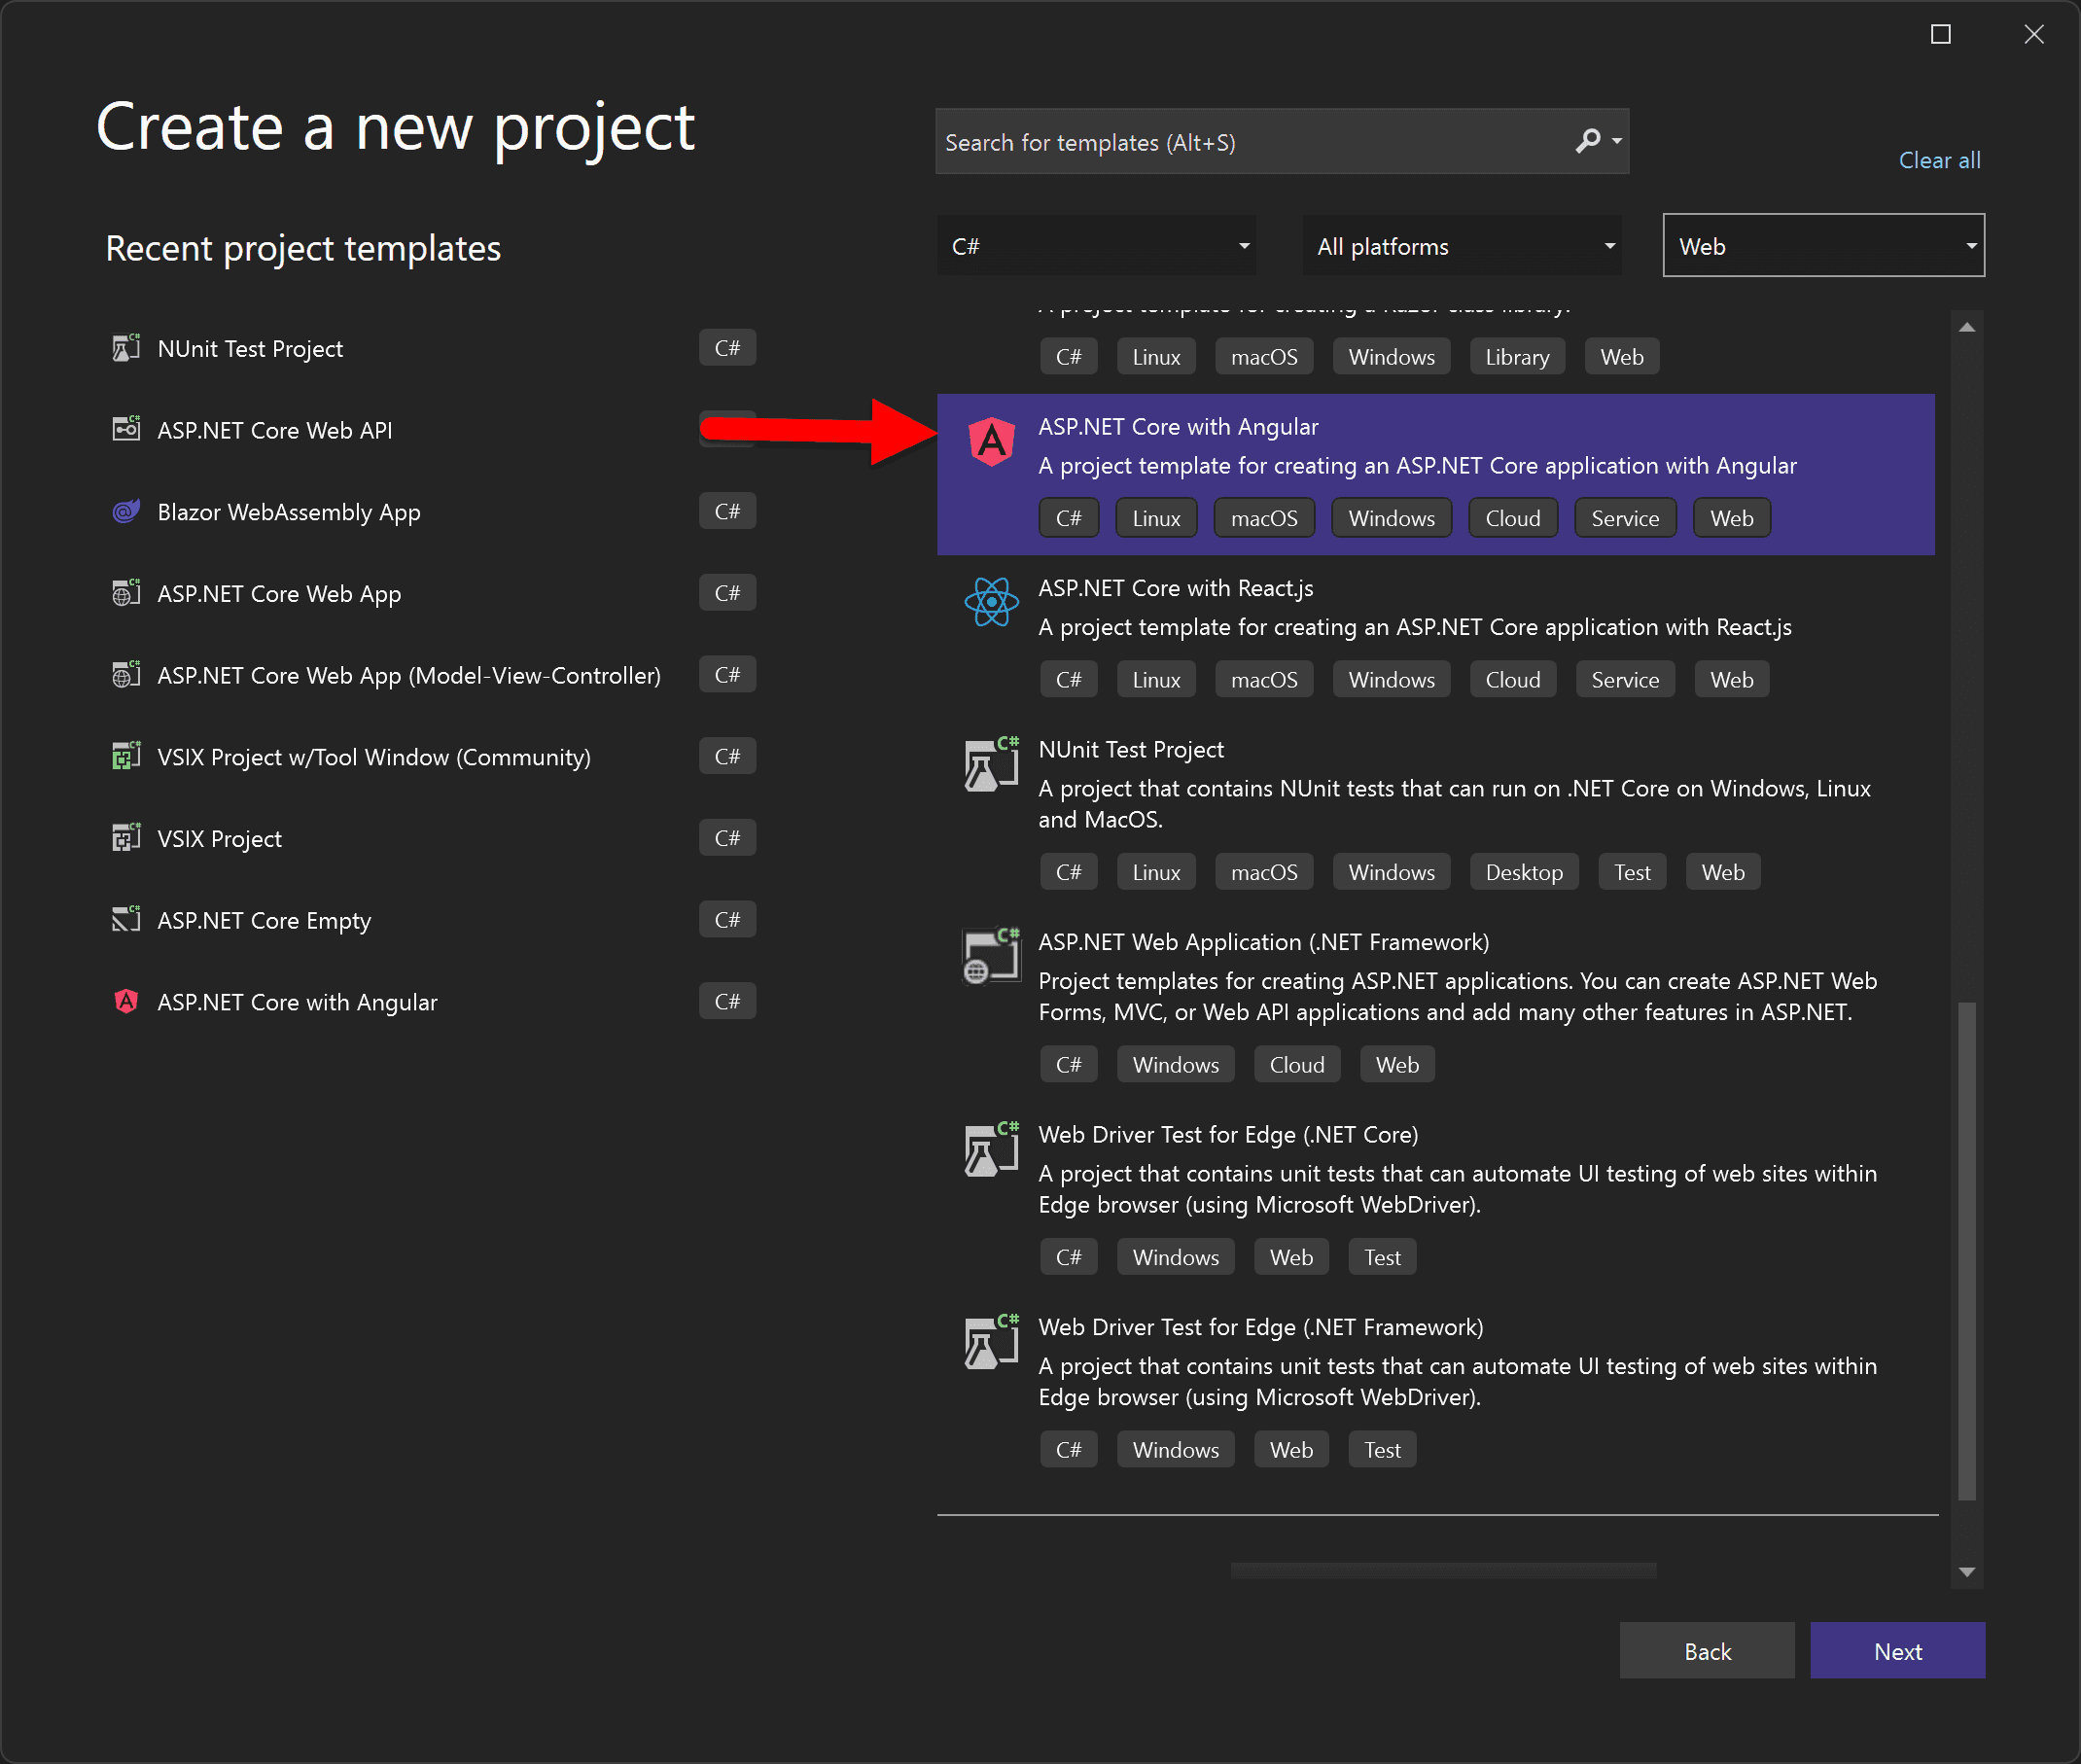
To create an Angular application with the SPA template new project from the command line or you can use Visual Studio. From ASP.NET Core 2.1 onwards, this template is included.
dotnet new angular -o MyAngularApp
Figure: Creating a project using Visual Studio Although Visual Studio can be used to create the project, we still recommend Visual Studio Code for working with the Angular code, as per Do you know the best IDE for Angular?
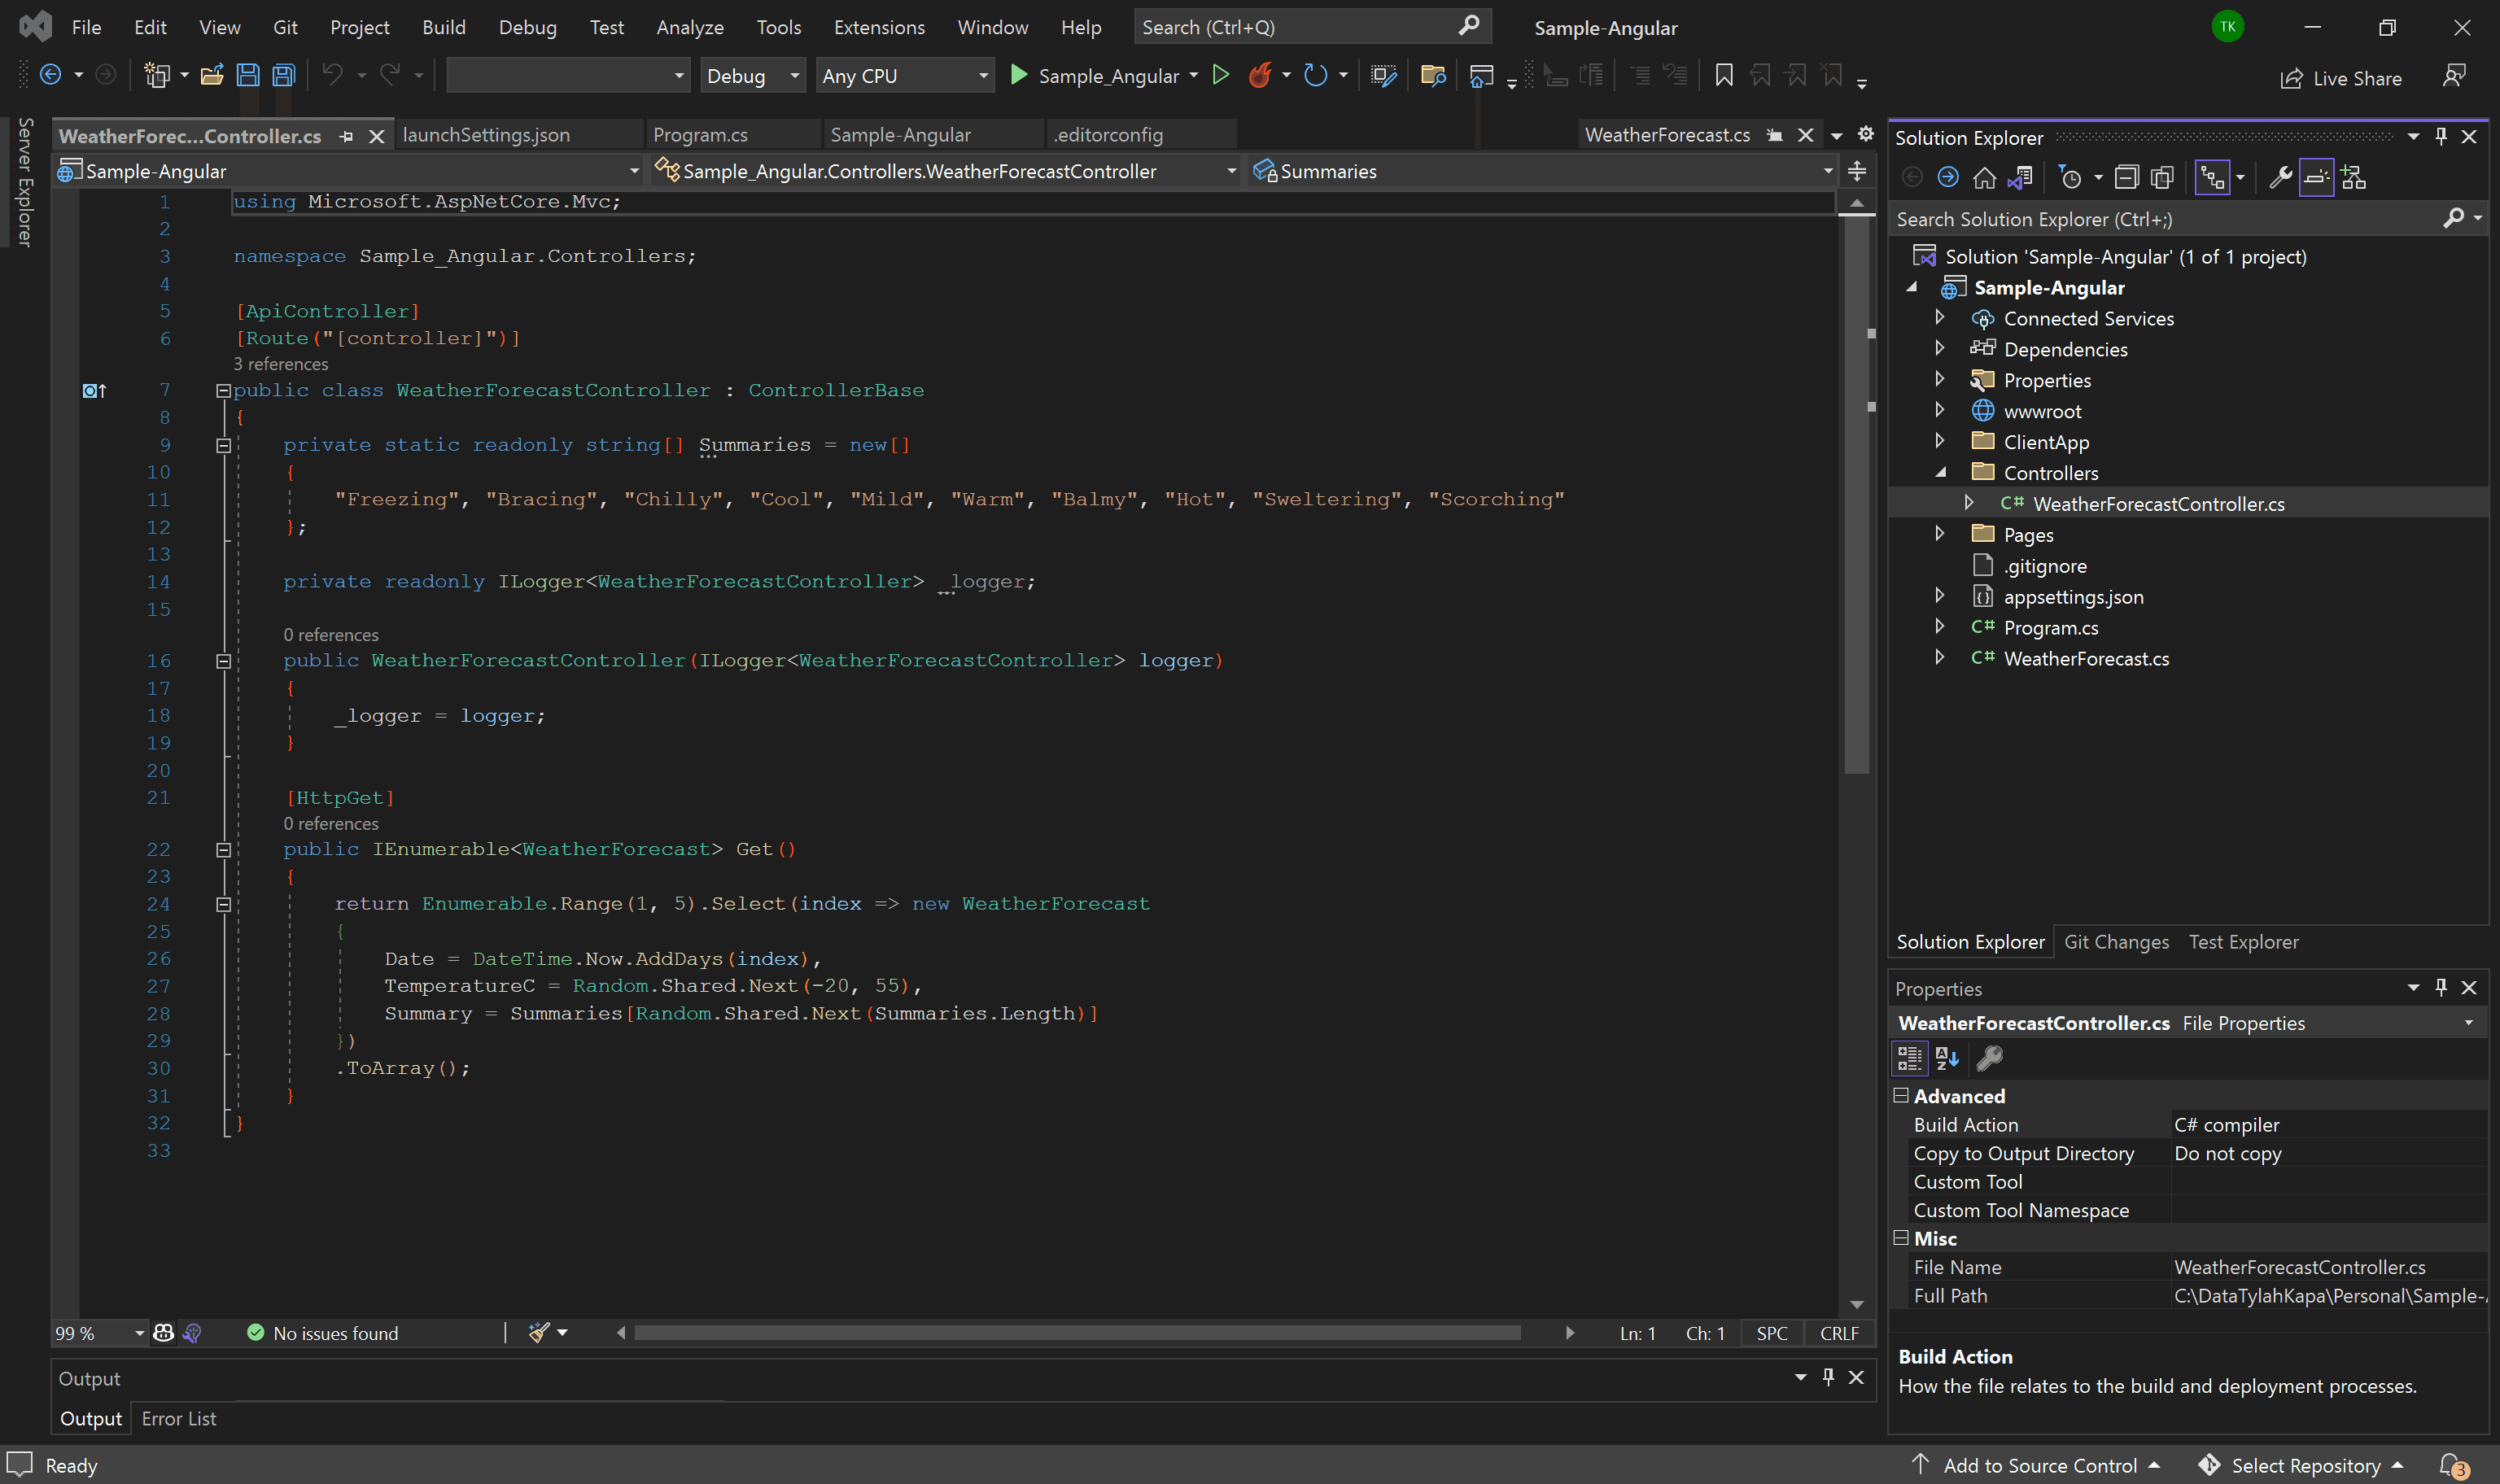
The ASP.NET Core SPA Template for Angular Includes:
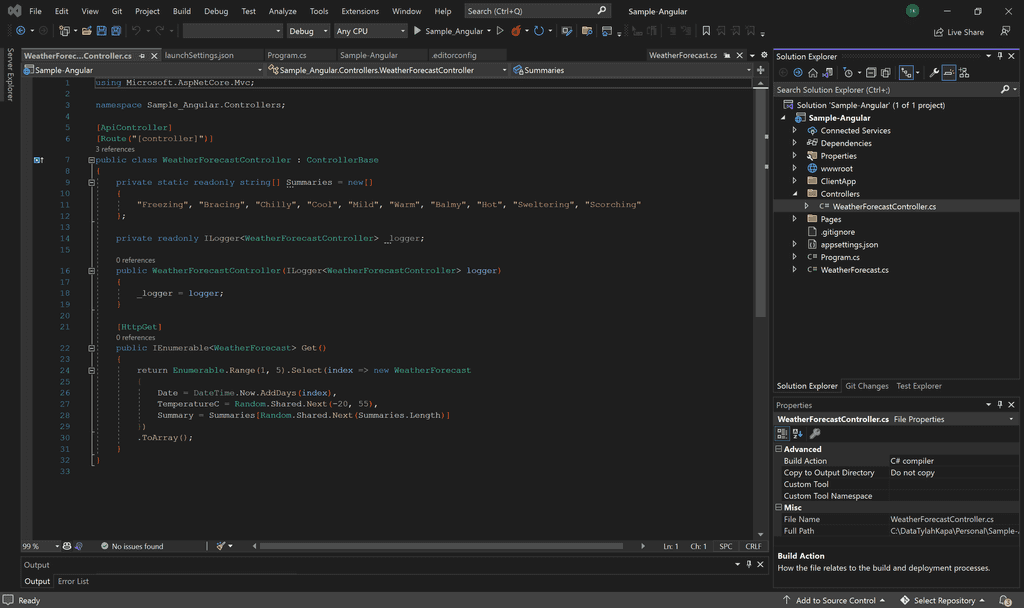
Figure: A simple example WebAPI 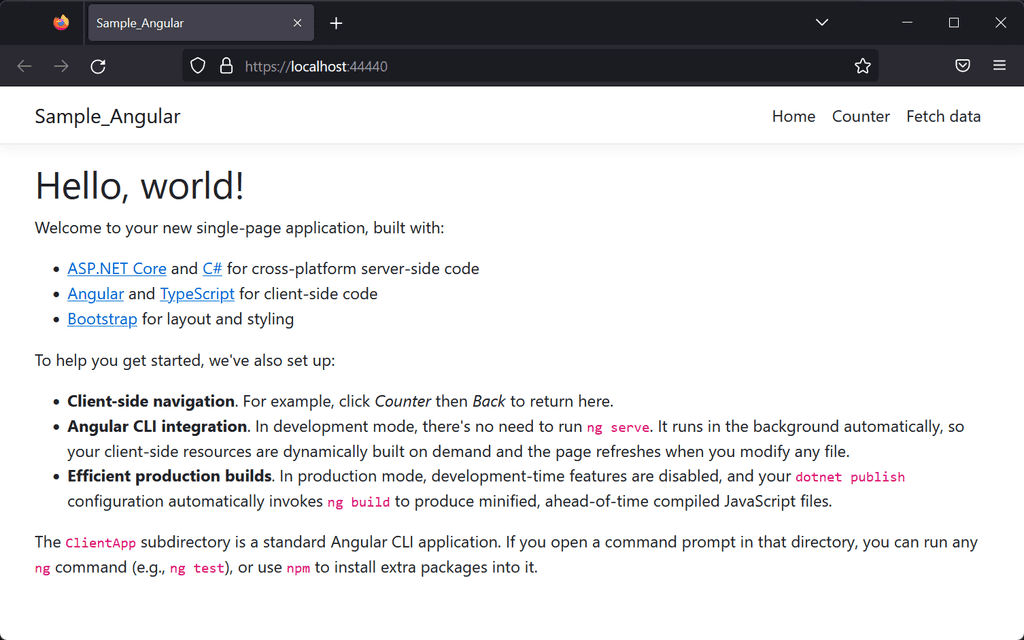
Figure: An Angular UI with Twitter Bootstrap styling This Angular app uses the Angular CLI and is fully compatible with any other Angular CLI app. If you want to create a new app from scratch, simply delete the contents of the ClientApp folder and run ng new.
So you get the benefits of easy client-server integration without having to compromise any Angular client-side features or Angular CLI tooling.
Typescript is the best choice when writing Angular and React applications. Angular is even written in Typescript itself!
Video: Typescript in 100 Seconds✅Advantages of Using TypeScript
-
Type Safety
- Error detection: - Identify and correct errors during the build phase, preventing runtime surprises.
- Top-notch tooling - Utilize enhanced features like autocomplete, Intellisense, efficient code navigation, and linting.
- Streamlined refactoring - Superior tooling simplifies refactoring compared to plain JavaScript.
- Embrace the latest - Leverage the latest language innovations for cleaner, more concise code.
-
Enhanced Code Expressivity
- Syntax sugar - Improves code readability and intuitiveness.
- Automatic imports - Streamline module integrations.
-
Wider Browser Support
- Multi-version targeting - Use a single TypeScript codebase across various JavaScript versions (e.g., ES5, ES6).
-
Boosted Code Confidence and Maintainability
- Minimized risk - Reduce the likelihood of bugs and bolster code reliability.
- Time efficiency - Dedicate less time to unit tests with increased code trustworthiness.
- Early bug detection - Identify and rectify issues early.
- Clarity - Craft cleaner, more transparent code.
❌ Disadvantages of TypeScript
- Learning curve - Developers unfamiliar with statically typed languages might face an initial learning challenge.
- Compilation step - An additional step to compile TypeScript to JavaScript can sometimes be perceived as a minor inconvenience.
- Integration with some libraries - Not all JavaScript libraries come with TypeScript definitions by default.
🔍 Explore TypeScript further at the official TypeScript website.
🎥 If you prefer video content, have a look at SSW TV Videos on TypeScript.
-
Before starting a software project and evaluating a new technology, it is important to know what the best practices are. The easiest way to get up and running is by looking at a sample application. Below is a list of sample applications that we’ve curated and given our seal of approval.
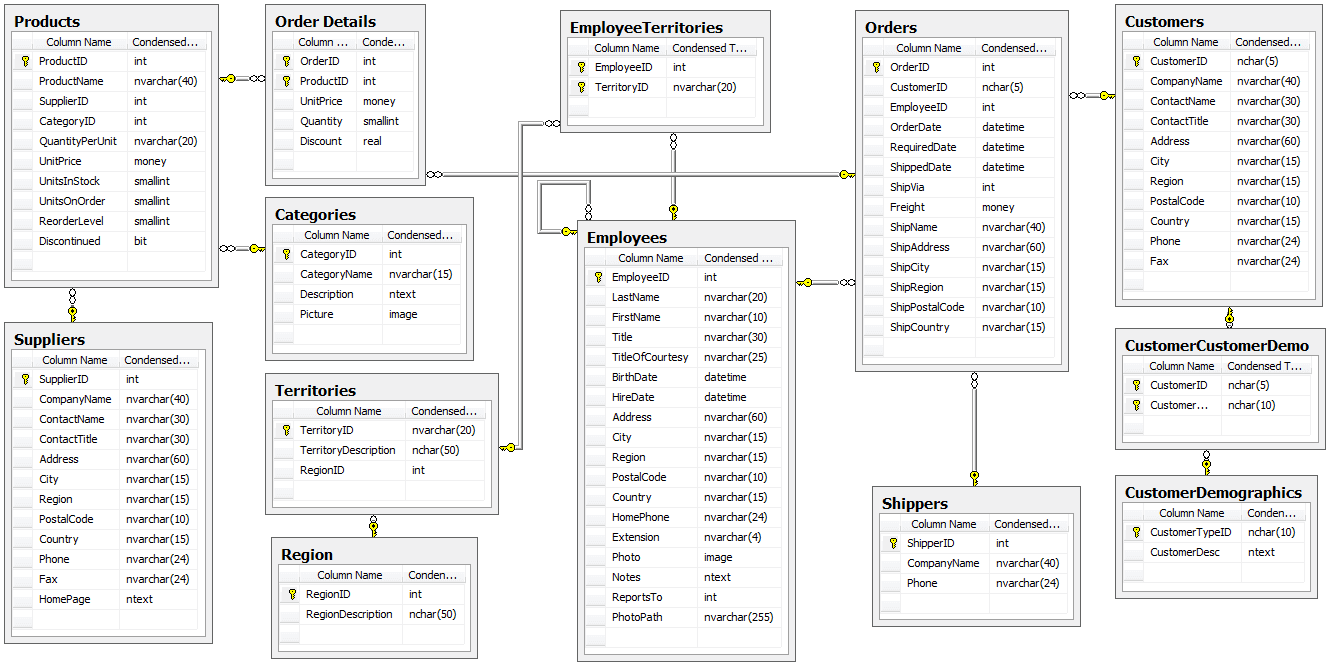
Northwind Schema
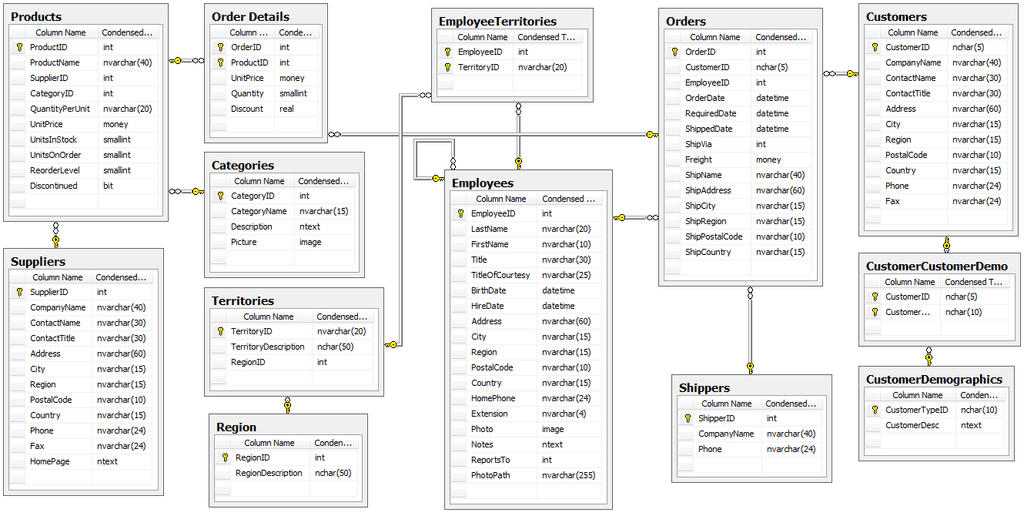
SQL Server
SQL Server and Azure SQL Database
.NET Core
- SSW Clean Architecture Solution Template An example REST API build with .NET 7 following the principles of Clean Architecture.
- SSW Northwind Traders A reference application built using Clean Architecture, Angular 8, EF Core 7, ASP.NET Core 7, Duende Identity Server 6.
- eShopOnWeb Sample ASP.NET Core 6.0 reference application, powered by Microsoft, demonstrating a layered application architecture with monolithic deployment model. Download the eBook PDF from docs folder.
- eShopOnContainers Cross-platform .NET sample microservices and container based application that runs on Linux Windows and macOS. Powered by .NET 7, Docker Containers and Azure Kubernetes Services. Supports Visual Studio, VS for Mac and CLI based environments with Docker CLI, dotnet CLI, VS Code or any other code editor.
- ContosoUniversity This application takes the traditional Contoso University sample applications (of which there have been many), and try to adapt it to how our "normal" ASP.NET applications are built.
Blazor
- Awesome Blazor Browser A Blazor example app that links to many other useful Blazor examples
- Blazor Workshop A Blazor workshop showing how to build fast food website
UI - Angular
- Tour of Heroes Default Angular sample app as part of the documentation
- ngrx Example App Example application utilizing @ngrx libraries, showcasing common patterns and best practices
UI - React
- Intro to React (Tic-tac-toe)
Introductory React tutorial that builds a simple Tic-tac-toe game - Intro to Redux (Counter example)
Introductory React Redux tutorial that builds a simple counter app
Building, bundling and compiling Angular applications can get complicated. You need great build tools.

Figure: Bad Example - Gulp requires hundreds of lines of config to build and bundle Angular applications 
Figure: Good Example - Webpack is an open-source JavaScript module bundler that can be used to build your application (and lots more as well). Teams with advanced build requirements use Webpack. The downside of Webpack is that it requires a large investment in learning Webpack - if it isn't required, the Angular CLI is a better choice 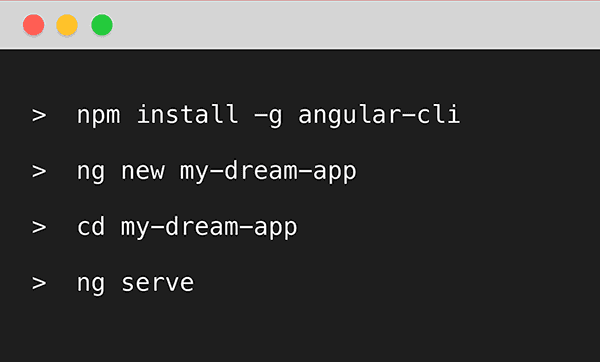
Figure: Good Example - Use the Angular CLI on all new projects that don't require custom Webpack builds. The Angular CLI generates components, routes, services, and pipes, follows best practices as well as building applications for production. The Angular CLI build includes best practices including Tree Shaking and Ahead of Time (AoT) compilation out of the box! The Angular CLI uses Webpack under the covers The main contenders for the best UI framework for Angular are:
- Angular Material (Recommended) - https://material.angular.io/
- Bootstrap - https://getbootstrap.com
Making the choice of which to use will depend on several factors related to your project:
- The look and feel of the site that your client is seeking
- The range of components that will be required in the application
- The developers' familiarity with the framework
- The designers' familiarity with theming in the framework
Angular Material
Angular Material has a very specific design metaphor, and if the look and feel is one that your client likes, then consider using it. But if the Material metaphor doesn't match the rest of the client's applications, then it may not be a good choice.
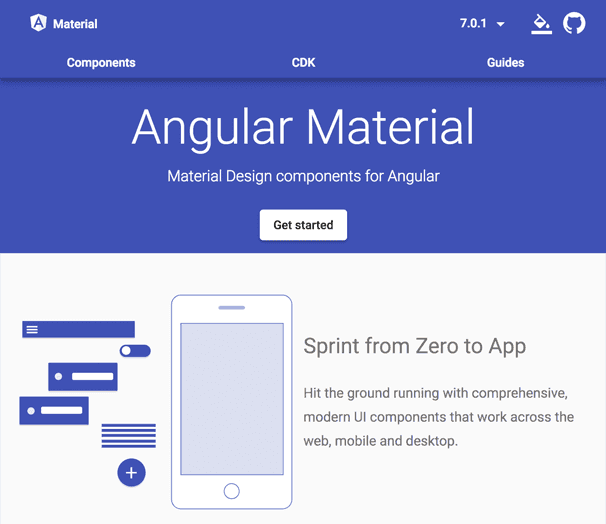
Figure: Angular Material is built by the Angular team Here are some reasons to use Angular Material:
✅ More popular than Kendo and Ant Design (see npm trends comparison)
✅ Good out-of-the-box grid customization and column sorting is included. Easy to add filtering (different way than Kendo).
✅ Free and open source.
Angular Material uses Angular components for its widgets. This means that the HTML rendered in the browser will include directives, divs, and classes that are not present in the component template HTML. It is for this reason that Designers without a good understanding of Angular may have difficulties tweaking the look of the Angular Material components.
Here are some tips for working with Angular Material:
- Information regarding theme can be found here: https://material.angular.io/guide/theming
- Tweaking individual components can be done by wrapping it in a CSS class and using ng-deep: https://blog.angular-university.io/angular-host-context/ If you prefer, all such modifications can be done in a separate SCSS file that is then added into styles.scss. Make sure you use a wrapper class so you do not change all other same Angular Material components in the project.
- Add the Flex Layout library to your project to take advantage of Flexbox. It makes it easy to use Flexbox classes via directives in your Angular HTML templates. Here is a demo website for Flex Layout: https://tburleson-layouts-demos.firebaseapp.com/#/docs
- For the creation of custom Angular Material components, the CDK can be used: https://material.angular.io/cdk/categories
-
If you need additional colours for the standard 'warn', 'primary', and 'accent', you can add that into global SCSS files:
.mat-success { color: $white !important; background-color: $success !important;}Now you can do following:
<button mat-raised-button color="success">Primary</button>
Bootstrap
Bootstrap is the obvious choice if your UI design requires extensive customization. Bootstrap makes it easy to theme your application's design and to tweak the design of individual components. In addition to components, Bootstrap 4 provides powerful layout and theming capabilities. These features make it popular with Designers.
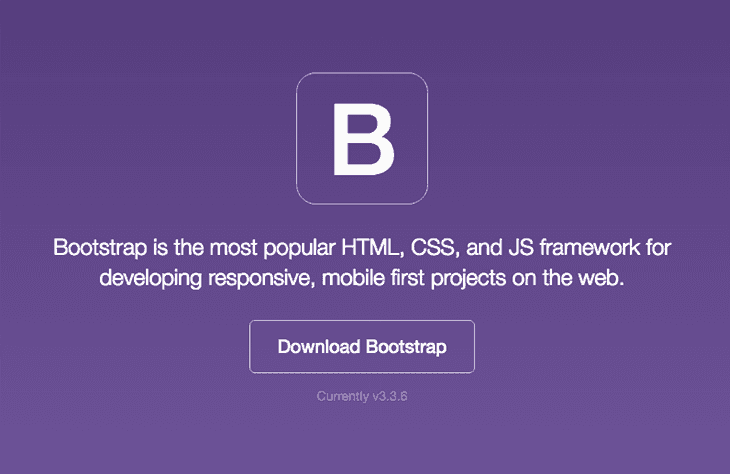
Figure: Bootstrap has been the recommended UI framework for the web for years There are two popular bootstrap-based Angular component libraries - ng-bootstrap and ngx-bootstrap. Both support Bootstrap 4 and provide a rich choice of components.
You can improve your Angular development experience by using some of these recommended packages and modules.
We recommend you use NPM to include them.
Angular Material
Material design components for Angular. https://material.angular.io/guide/getting-started
Angular Bootstrap
Angular components for Bootstrap 4.https://ng-bootstrap.github.io/
Ng-boostrap
Best way to quickly integrate Bootstrap 3 or Bootstrap 4 Components with Angular. https://ng-bootstrap.github.io
OpenID Token Manager
Handles management of OpenID authentication and tokens.https://github.com/IdentityModel/oidc-token-manager
NgxSpinner
A library for loading spinner specifically for Angular 4/5/6.https://www.npmjs.com/package/ngx-spinner
ngx-toastr
A library for displaying toasts in Angular applications.https://www.npmjs.com/package/ngx-toastr
For more, please check out the most popular npm packages: https://www.npmjs.com/search?q=ng&ranking=popularity.
A Service is a singleton object with a lifetime scope of the application. It is instantiated only once during the lifetime of an application. When combined with Angular’s Dependency Injection, a service can be injected into any component in an application via Constructor Injection. This makes a Service perfect for sharing reusable functionality throughout an application.
A common example of when you’d use a Service is when you want to retrieve data from a WebApi using the HttpClient. There may be several places in your application where you need to retrieve the same list of data. By placing this functionality in a Service it gets rid of the duplicated code in the components that make the WebApi call.
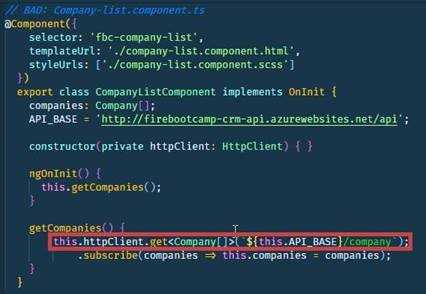
Figure: Bad Example - Code that is reusable should be placed in a Service 
Figure: Good Example - Reusable code is placed in a Service and the component calls the Service The Single Responsibility Principle is a well understood, and well-accepted tenet of good code design. It states that a class should do one thing, and do it well - The same applies to Components used with Frameworks such as Angular, React, Vue and Blazor.
When designing components, keep them small, modular and reusable. For example, if you have a menu, put it into a menu component, don’t put it in your app component.
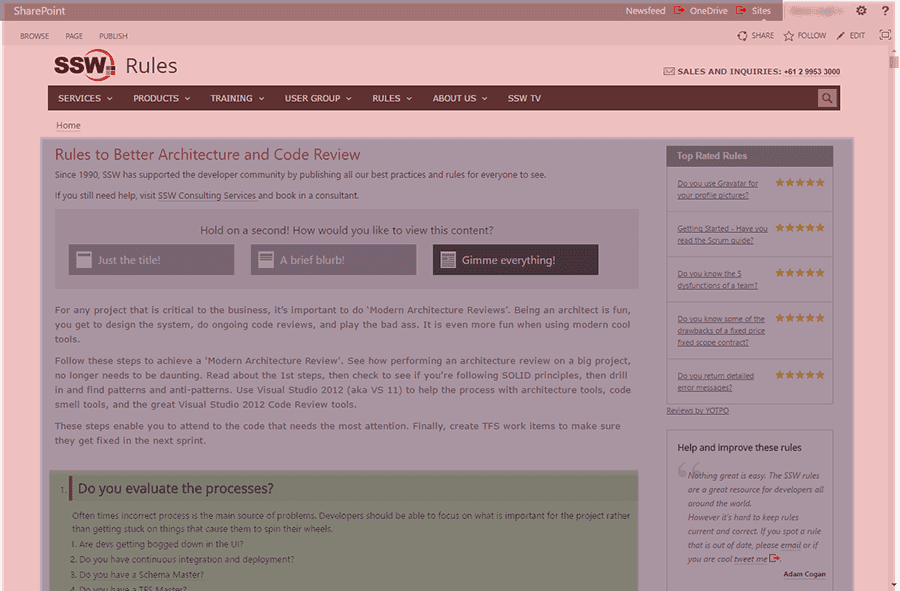
Figure: Bad example - Having just 3 components for the page makes it difficult to reuse, maintain and test 
Figure: Good example - Splitting up the page into 11 components means they are small and targeted - and thus easy to maintain and test. Components can be reused on other pages Single page applications (SPAs) are getting more and more popular, and for good reason – a better and faster user experience, reduced server load and encourages good API separation.
But have you ever visited a website, thought “I’ll refresh that” and then got taken back to the home screen? Or tried to copy or bookmark the URL, only to find it’s just “/Home”? This happens when client-side routing hasn’t been implemented properly and is a big hit to a site’s usability.
This is easily fixed with Angular ’s routing capabilities, and implementing it in your SPA will confer several advantages:
- URLs can be copy-pasted and shared
- Page refreshes work as expected
- Less prone to errors
- Better separation of concerns (navigation vs page state)
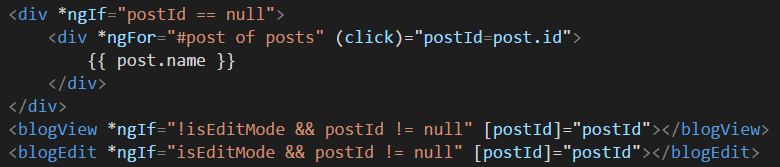
Figure: Bad example - The blog post component is choosing components based on the state of the component A better way is to set up routes, and use a router (the first-party component router is great for this) to manage your components:
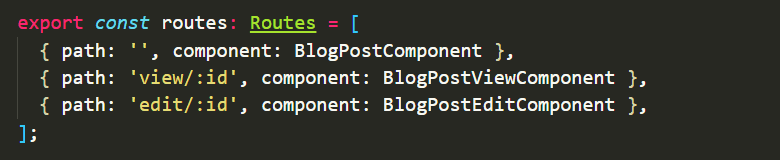
Good: Setting up declarative routes and outlets gives a good user experience, persistent URLs, and fewer moving parts Inevitably any well-engineered Angular application will need to send and receive data from a service of some sort – usually a Web API. A common mistake people make when doing this is using typescript’s built in any type for these services, which offers no type safety whatsoever.

Figure: Bad example - The "any" type is used as the DTO for this service. There is no type safety One step better is to manually create interfaces for the DTOs. This gives type safety, but still means a lot of manual, tedious work to generate the interfaces.
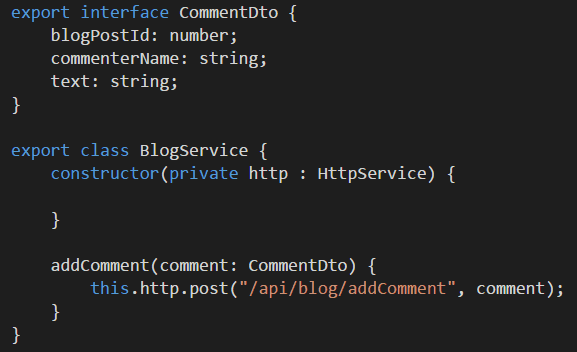
Figure: OK example - Manually coded interface ensures any object passed to the service is in the correct format But this still doesn’t give safety over-the-wire – if the server side model changes, a developer has to remember to update it here, and hope that there are no typos. This is also extra effort to perform something mindlessly repetitive – something a machine is much better at doing. And we are programmers, right?
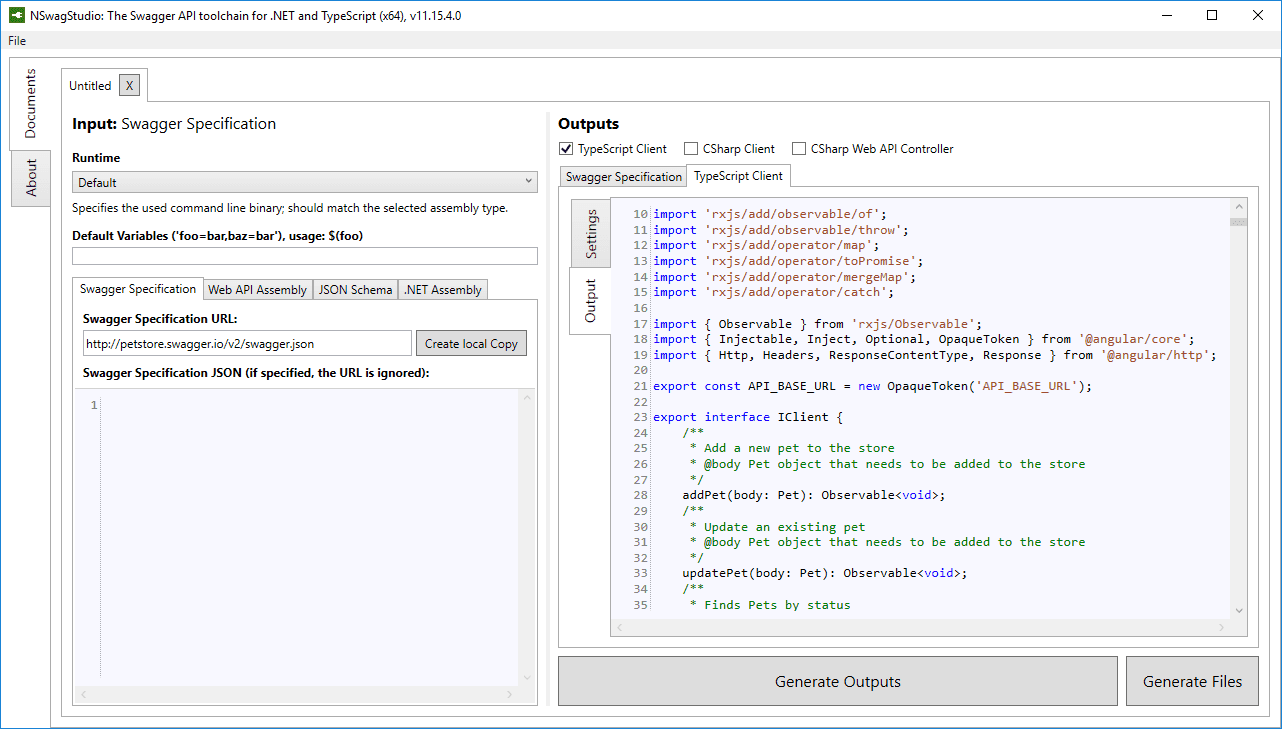
If your WebAPI has an OpenAPI (aka Swagger) specification, then the NSwag tools can build a complete Typescript client configured as an Angular injectable service - complete with:
- HttpClient calls that return Observables
- All defined endpoints implemented as methods in the service
- All DTOs included as Typescript interfaces
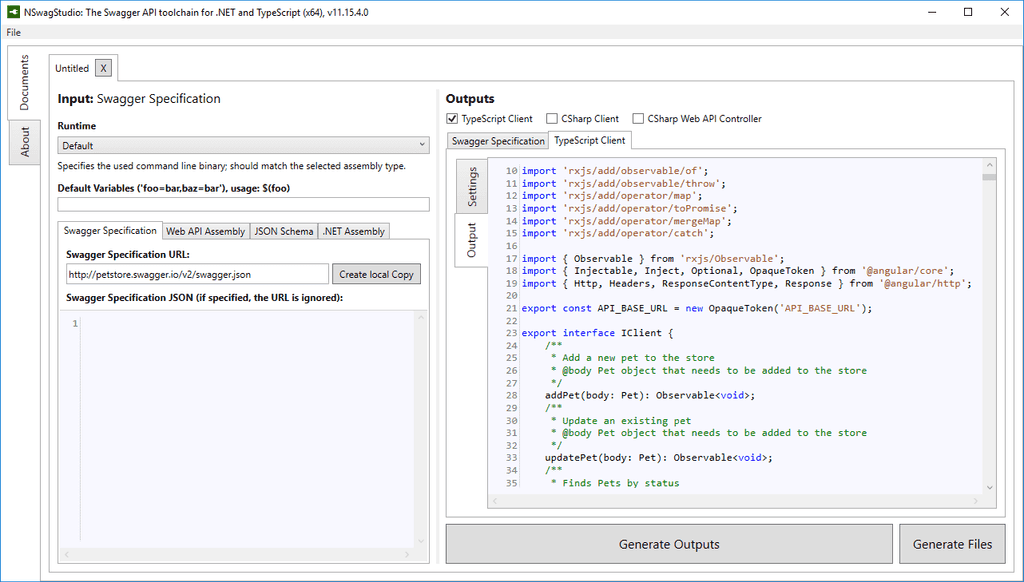
Figure: Good example - NSwag generates the boring work so that you don't have to 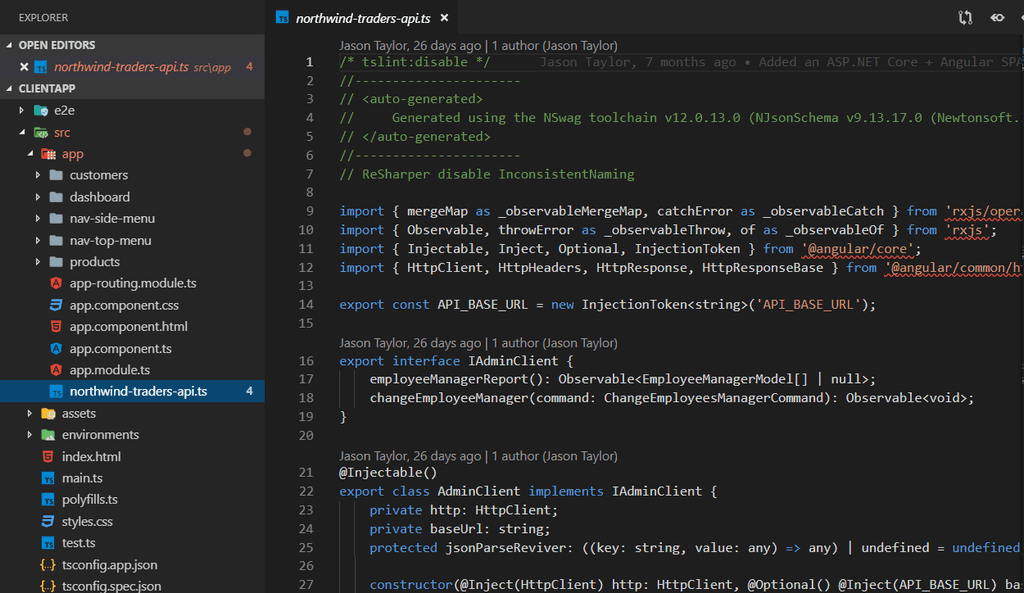
Figure: Good example - This client side api-access code from Jason Taylor's NorthwindTraders sample project has been generated by NSwag Using DOM is fine, but manipulating DOM directly in your component is not. With the introduction of Angular, there has been a big push in ensuring the DOM stays out of your JavaScript code. It is designed in such a way that an existing Angular application can be ported to another target by simply replacing the template and template loader. Projects such as Angular React Native Renderer leverages this to allow native mobile app development in Angular.
- Smaller component code making it easier to maintain
- Faster running and easier to write unit tests
- Easier for designers to get involved
This means that the component's state must expose things that are useful to the template as public properties or fields, and the Angular should read these fields to draw itself.
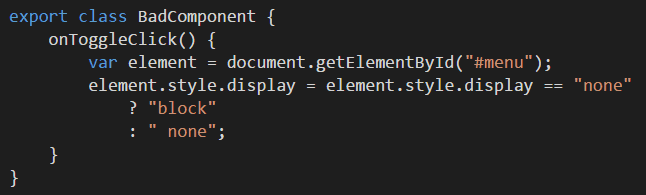
This component manipulates the DOM directly to show and hide the menu 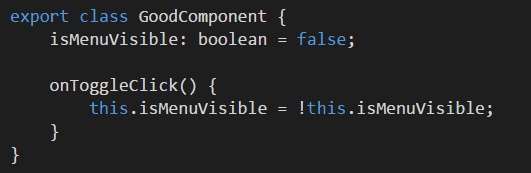
This component sets component state, which the template can use. It is simpler, more descriptive and easier to test State management in Angular can quickly become unmaintainable if done incorrectly. It is important to fully understand why you are implementing state management and then decide how you are going to do it.
There are many different options you can choose from, including the following:
State managed in parent-child component hierarchies
In this method, components do not know about the state of other components but rather receive data via inputs and emit data via events. It works well for simple scenarios but falls over when lots of communication is required between different components.
Pros:
- Simplicity - Out of the box
Cons:
- Communication - No shared state across component trees
- Scalability - When the depth of hierarchies grows, it becomes hard to deal with
- Separation of concerns - Tight coupling between components in the tree
- Testability - You cannot properly unit test parent-child components
State management in observable services
Using observable services takes state management to the next level. Using this method, we can enable communication between different component trees. This solution is suitable for most scenarios.
Pros:
- Sharing state - You can pass state between different component trees
- Ease of use - Quick and easy to implement
- Separation of concerns - Keeps business logic away from the presentation logic
Cons:
- Scalability - Services can become a web of dependencies if not kept in check
- Predictability - Consistency is not enforced in the way state is managed
- Testability - It can be hard to test services due to the inherent dependency web
Redux e.g. NgRx (see rule: https://www.ssw.com.au/rules/use-ngrx-on-complex-applications)
Redux is a design pattern which centralizes the state into a single shared store across the application. It introduces several constraints on how data flows in and out of the state store in order to make the state scalable and consistent. However, it requires a lot more code and can lead to longer development times. Often this makes sense for large, complicated applications but less so for simple ones.
Pros:
- Centralized state - Makes global state management simpler
- Separation of concerns - Goes one step further by separating business logic and state management
- Predictability - Makes state change predictable by enforcing consistecy
- Testability - Pure functions are much easier to test as they have no external dependencies
Cons:
- Velocity - It can take more code to write
- Boilerplate - Requires the use of many files and has a lot of repetition
- Learning curve - Can be easy to get wrong if you are an inexperienced user
- Third-party library - Not part of the standard Angular library may increase overhead when upgrading Angular. Also introduces additional bundles in the published artifact.
Heads Up: For new teams creating their first SPA using Angular, it is recommend to limit the initial focus to learning Angular, TypeScript, and RxJs. Avoid including advanced state management patterns such as NgRx, unless someone on the team has prior experience. Start with a simple approach to state management and evolve your design once the team has mastered the basics. When your team is ready, be sure to investigate the multitude of patterns, supporting libraries, and best practices available for advanced state management. If you are developing an application that absolutely requires advanced state management then be sure to invest in some training and / or enlist the help of another developer with the right skillset.
NGRX is a powerful state management library for Angular applications. By implementing the Redux pattern, it provides a predictable and centralized approach to managing application state.
On large applications, it becomes very difficult to maintain state. The redux pattern helps resolve this issue.
NgRx is the redux pattern implemented for Angular. View on GitHub.

Figure: NgRx supercharges the redux pattern with RxJS Benefits:
- Easy state management
- Better tooling and debugging
- Simpler applications to build
- Increased performance
- Code that is easy to test
Figure: NgRx supercharges the redux pattern with RxJS 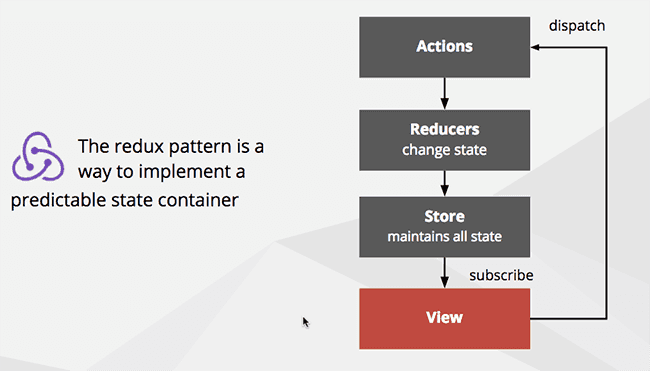
Figure: The redux pattern is a way to implement a predictable state container The three principles of the redux pattern:
- The entire state of the application is represented in a single JavaScript object called a store.
- The store is acted upon using special functions called reducers.
- State is immutable and reducers are the only part of the application that can change state.
What do we mean by complex?
State management such as ngrx is most useful when applied to shared data - that can be changed or "mutated" in multiple ways. When applied to data that is not shared there is a risk of adding much more effort with little value
Simple Example
"Add a company edit form to capture a company's address and contact details, when the user clicks 'save', we send a HTTP POST to an API".
In this type of scenario, the company details you are editing are not shared with any other component so you get little benefit from using state management.
Complex example
"Add a checkout screen where users can change order quantities and see the totals immedately update. Also there is a widget in the toolbar that shows number of items and cart total at all times"
Getting Started with NGRX in Angular Applications
Step 1: Define Actions:
Actions are defined to be dispatched in your application.
Actions represent events or intents that trigger state changes.
Each action is typically defined as a constant using the
createActionfunctionActions may also include payload data using the props function.
For example:
import { createAction, props } from '@ngrx/store';

export const loadProducts = createAction('[Product] Load Products');
export const productsLoaded = createAction('[Product] Products Loaded', props<{ products: Product[] }>());

// Add more actions as needed
Step 2: Create Reducers:
Reducers handle state changes based on dispatched actions.
Reducers are pure functions that take the current state and an action as input and return a new state.
Define the initial state for each state slice and handle state changes in response to specific actions.
Use the
createReducerfunction from @ngrx/store to create reducer functions.For example:
import { createReducer, on } from '@ngrx/store';
import { productsLoaded } from '../actions/product.actions';

export interface ProductState {
  products: Product[];
}

export const initialState: ProductState = {
  products: [],
};

export const productReducer = createReducer(
  initialState,
  on(productsLoaded, (state, { products }) => ({ ...state, products })),
  // Add more reducer functions as needed
);
Step 3: Configure the Store:
Import the necessary NGRX modules, such as StoreModule and StoreDevtoolsModule, into your root module (e.g., app.module.ts).
Provide the root reducer using the reducer property of the StoreModule.forRoot() method.
Optionally, include StoreDevtoolsModule.instrument() to enable the Redux DevTools extension.
For example:
import { StoreModule } from '@ngrx/store';
import { StoreDevtoolsModule } from '@ngrx/store-devtools';
import { rootReducer } from './store/reducers';

@NgModule({
  imports: [
    StoreModule.forRoot(rootReducer),
    StoreDevtoolsModule.instrument(),
    // Other imports and configurations
  ],
  // Other module configurations
})
export class AppModule { }
Step 4: Dispatch Actions and Access State from the UI:
Import the necessary action creators and selectors into your Angular components or services.
Inject the Store into your components or services.
Dispatch actions using the dispatch() method of the Store to trigger state changes.Access the state using selectors and the select() method of the Store.
For example:
import { loadProducts } from './store/actions/product.actions';
import { selectProducts } from './store/selectors/product.selectors';

constructor(private store: Store<AppState>) {}

// Dispatching an action
this.store.dispatch(loadProducts());

// Accessing a State
this.store.select(selectProducts).subscribe((products) => {
  // Access and use the products state
});
Define Effects (Optional):
You can also handle side effects in NGRX by defining Effects, such as asynchronous operations or APIs interactions.
Figure: NGRX pattern with Effect Effects listen for specific actions and perform operations in response, such as making HTTP requests.
Effects are created as classes with the @Injectable() decorator and typically usethe createEffect function from @ngrx/effects.
Register the effects using the EffectsModule.forRoot() method in the root module.
For example:
loadProducts$ = createEffect(() =>
  this.actions$.pipe(
    ofType(loadProducts),
    mergeMap(() =>
      this.productService.getProducts().pipe(
        map((products) => productsLoaded({ products })),
        catchError((error) => of(productsLoadError({ error })))
      )
    )
  )
);
Check out NGRX Documentations to see more details on how you can set up NGRX in your Angular application
This type of complexity is perfect for ngrx! The state of your shopping cart can be in kept the Store an both the main Checkout Component and the Cart widget can be kept in sync by selecting this state from the store and raising actions to mutate that state in controlled and predictable ways.
Debugging JavaScript application can be difficult. Having to console.log results can make for a slow and cumbersome development experience. There are five ways you can debug a JavaScript application without leaning on console.log() as your main tool.
Options for Debugging JavaScript applications
1. Debug your JavaScript using console.log()
While this is a valid approach it should only be utilized for the simplest of manual debugging tests as they are slow, you have to re-run the app every time, do not allow you to change state mid-flight and developers sometimes forget to clean up after themselves and the code becomes riddled with console.log statements.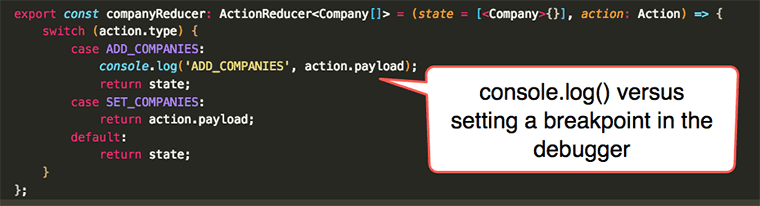
Bad code - Using console.log() to debug your JavaScript 2. Debug in the browser with a breakpoint
Chrome is by far the most popular browser for the average web developer followed by Firefox, but all the major browsers have a debugging tool.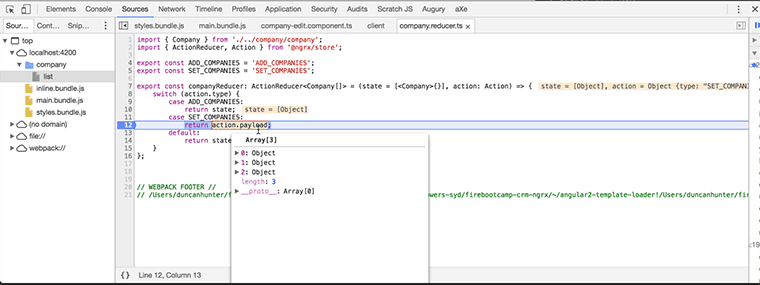
Figure: Old school JavaScript debugging with Chrome Dev Tools is still the best and most versatile tool 3. Debug in an IDE
It is often more effort than it is worth to debug JavaScript in your IDE and it is still not very popular. If your app is a server-s ide NodeJS JavaScript app then it is very different since this type of JavaScript app does not run in the browser and this is what the IDE is designed for.- Visual Studio Code Chrome Debugger - Painful to set up source maps for advanced JavaScript applications that run in memory dev servers like WebPack Dev Server.
- Visual Studio 2015 - Only works with TypeScript in Internet Explorer
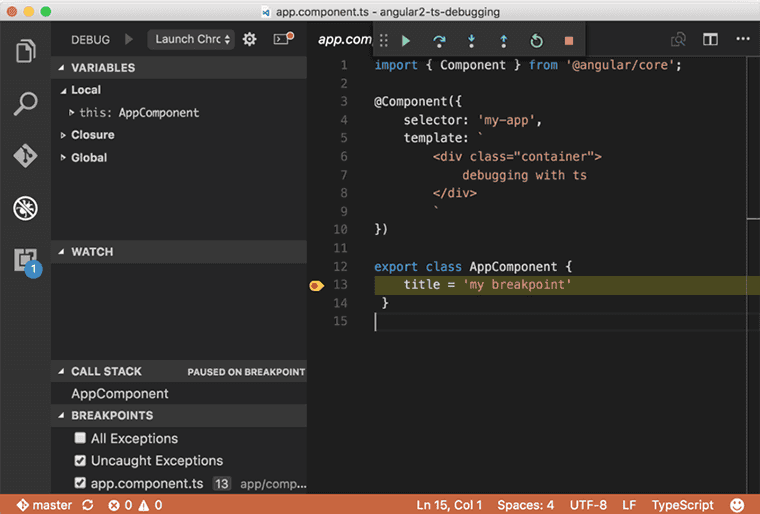
Figure: Visual Studio Chrome Debugger with breakpoint set 4. Time Travel Debugging with Redux
Using tools like ngrx's store dev tools. You can traverse back and forth between states with excellent UI tools. Debugging through your states is much better than just debugging the current state but also to be able to see the actions triggered to change state.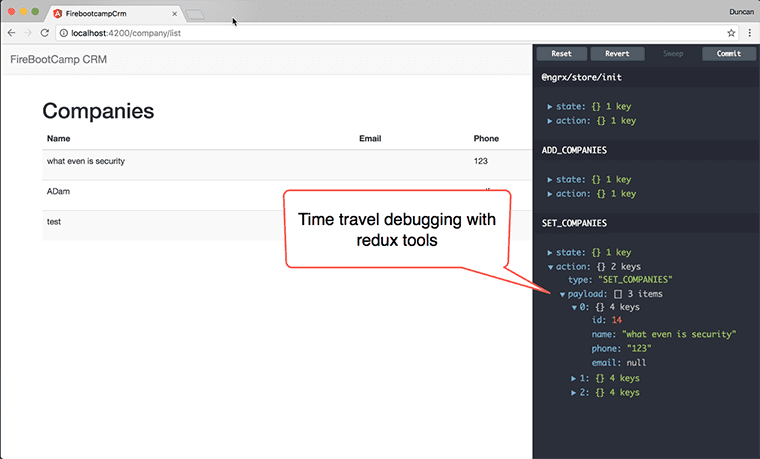
Figure: Example of redux based time travel debugging 5. Hot Module Reloading
The problem with the above approaches is every time you make a change to your code you need to reload the website and navigate back to the page and state of that page again and again to repeat your manual test. Hot Module Replacement (HMR) exchanges, adds or removes modules while an application is running without a page reload.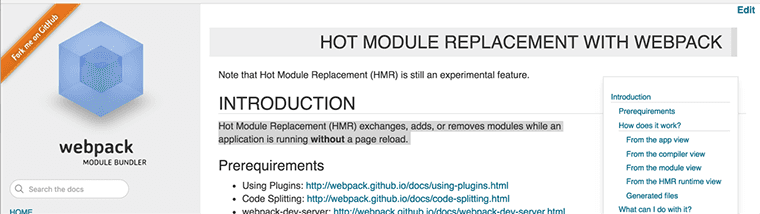
Figure: Hot module reloader documentation from WebPack website There are 2 general types of components according its complexity: presentational and smart components. Presentational component is a component that is purely driven by its input data. Smart component on the other hand, is more complex - it can have business logic, dependencies, and also store its own state.
Aiming to have more presentational components makes building applications easier; it provides high reusability, and they are easier to debug since they have the same output for the same input.
Smart components are harder to debug since they now have dependencies and state that need to be taken into account when debugging.
// company-list-table.component.ts

@Component({
  selector: 'fbc-company-list-table',
  template: `
    <table id="company-list-table" class="table table-hover table-striped company-list-table-component">
      <thead>
        <tr>
          <th>Name</th>
          <th>Phone</th>
          <th>Email</th>
          <th></th>
        </tr>
      </thead>
      <tbody>
        <tr class="item" *ngFor="let company of companies">
          <td>{{company.name}}</td>
          <td>{{company.phone}}</td>
          <td>{{company.email}}</td>
          <td class="button-column">
            <button routerLink="/company/detail/{{company.id}}" class="btn btn-default" >Details</button>
            <button routerLink="/company/edit/{{company.id}}" class="btn btn-default" >Edit</button>
            <button (click)="confirmDelete(company)" class="btn btn-default">Delete</button>
          </td>
        </tr>
      </tbody>
    </table>
  `
})
export class CompanyListTableComponent {
  @Input() companies: Company[];
  @Output() deleteCompanySelected = new EventEmitter<number>();

  confirmDelete(company: Company) {
    this.deleteCompanySelected.emit(company.id);
  }
}
Figure: Good example - A presentational component with no injected dependencies
One of the main problems working on a huge monorepo solution is usually the development experience and the build time.Nx is one of many tools that can improve this experience in JavaScript projects.
The amount of code that needs to be processed by the compiler scales proportionally with the solution size. Hence, the compile time will grow naturally as the solution grows in size.This surely affects both the development experience and the team's velocity, leaving both developers and stakeholders unhappy.
Nx is a JavaScript build system that aims to make developing on monorepo solution easier and faster.Nx offers the following features:
- Cached build - faster development and build time
- Task Pipeline - provide tools to control how the monorepo build is performed
- Dependency graph - see the relationship between projects
- Affected graph - see which projects is affected by your commit
- and many more...
Currently, Nx supports many frameworks, such as Angular, React, Node, and many more.
Adding a tool such as Nx to a project will obviously add another moving parts to the solution, so it's a good idea to know the advantages and disadvantages of Nx.
Advantages:
- Faster development build time
- Faster CI time with NxCloud
- Monorepo collaboration tool with Package based or Integrated repo based strategy
Disadvantages:
- Additional external dependency to be maintained
- Learning curve
- Only supports JavaScript projects
Consider using Nx in a project when your solution:
- Is a JavaScript monorepo
- Is medium to large sized
- Contains multiple projects
- Share codes between projects
- Has slow build time
Standalone components were introduced in Angular 14 and should be used instead of modules for every new component you create.
There is a number of advantages of using standalone components over modules as they:
- Reduce the amount of boilerplate code. They don't belong to a particular NgModule and don't have to be declared, so can be used in any part of the application
- Streamline component creation
- Allow to lazy-load the component without using an NgModule
- Flatten the learning curve for new developer as the concept of NgModules is off the table
To make a component standalone, set
standalone: true@Component({ standalone: true, selector: 'my-component', imports: [FooComponent], template: ` ... <foo-component></foo-component> `, }) export class MyComponent { // component logic }Angular provides built-in error-handling mechanisms such as ErrorHandler and HttpInterceptor.
Handling Uncaught Errors
By providing an
ErrorHandlerclass, all uncaught errors will go to this service.@NgModule({ declarations: [...], imports: [...], providers: [ { provide: ErrorHandler, useClass: ErrorHandlerService, } ], ... }) export class AppModule { }@Injectable({ providedIn: 'root' }) export class GlobalErrorHandlerService implements ErrorHandler { handleError(error: unknown): void { // Handle the error here, you can inject services console.error('Uncaught error!', error); } }The above example instructs Angular to use
ErrorHandlerServiceas the defaultErrorHandlerin the scope ofAppModule. Any injectable services can also be injected in the customErrorHandlerService, allowing various actions to be done in this service.Scoping Error Handler
With how Angular treats the
ErrorHandleras an injectable service, we can also control the scope of theErrorHandler.For example, if we want to provide a global error handler as a fallback and a specific error handler for a route, we can create a lazy-loaded module for that route and then provide another
ErrorHandler. This approach will override the existingErrorHandlerfor this particular route. See also Limiting provider scope by lazy loading modules.@NgModule({ declarations: [...], imports: [ RouterModule.forChild(...), ... ], providers: [ { provide: ErrorHandler, // HomeErrorHandlerService is the ErrorHandler for routes under this lazy-loaded module useClass: HomeErrorHandlerService, } ], }) export class HomeModule { }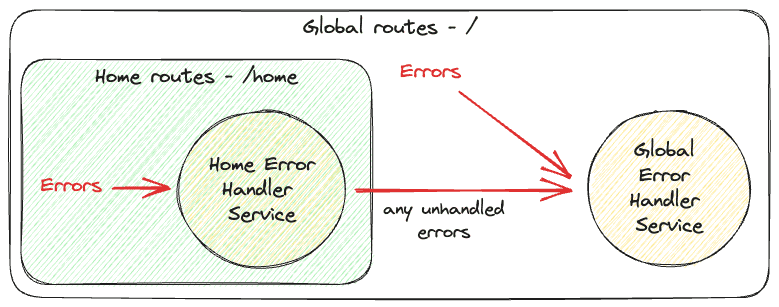
Figure: Scoping Error Handler in Angular
Figure: Scoping Error Handler in AngularHandling API Errors
All failed API calls not handled (i.e. not caught) will be handled by
ErrorHandler. There are several ways to handle API errors by hand in cases where we need to do a specific error handling for an API; some of them are:-
In
Subscribemethod:this.http.get('/foo').subscribe({ next: response => { // Handle response }, error: err => { // Handle error console.error('Error while calling API', err); }, }); -
In
pipeusingcatchError():this.http.get('/foo').pipe( catchError(err => { // Handle error console.error('Error while calling API', err); return of(null); // Return fallback value }) ).subscribe(response => { // Handle response });
Catching API errors in HTTP Interceptor
Angular provides a mechanism to intercept HTTP calls using HttpInterceptor. Interceptors behave like middleware for API calls.
HttpInterceptorprovides many functionalities, one of which is to alter how API calls behave - specifically on error.Below is an example of how to handle failed API calls directly in the
HttpInterceptor:// app.module.ts @NgModule({ declarations: [...], imports: [...], providers: [ { provide: HTTP_INTERCEPTORS, useClass: GlobalHttpInterceptorService, multi: true, }, ], ... }) export class AppModule { } // global-http-interceptor.service.ts @Injectable({ providedIn: 'root' }) export class GlobalHttpInterceptorService implements HttpInterceptor { intercept( req: HttpRequest<any>, next: HttpHandler ): Observable<HttpEvent<any>> { return next.handle(req).pipe( catchError(err => { // Handle API error console.error('Error while calling API', err); return of(err); }), ); } }Note that since we can manipulate how we return the original request with
next.handle(req), we can also implement more advanced patterns like retries.Use ProblemDetails
A structured error message is needed to communicate errors effectively between API and frontend so the frontend application can identify errors correctly and show the right user experience for the fitting errors.
One of the standard structures is using the
ProblemDetailsformat. Read more about this on Do you return detailed error messages? .Using
ProblemDetails, we can identify the errors, extract information from the error payload, and act appropriately based on the error.In the example below, we show a message box showing the error message from the API.
// Example error payload { "type": "https://example.com/probs/invalid-id", "title": "Invalid ID", "status": 400, "detail": "The provided ID has invalid characters.", "instance": "/account/12%203", }this.http.get('/foo').subscribe({ next: response => { // Handle response }, error: (err) => { // Handle error if (!(err instanceof HttpErrorResponse)) { console.error('Error while calling API', err); } if (err.error.type === 'https://example.com/probs/invalid-id') { // Show error message this.snackbar.open(`${error.title} - ${error.detail}`); return; } console.error('API error', err); }, });-
One common mistake in writing a front-end component is trying to fit everything in a single component. This can easily lead to unmaintainable code in the long run, especially for complex components.
Why should you separate the logic?
In simple components, having many logics (e.g. API calls and binding to the form) written to the component itself sometimes works OK, especially if the aim is to reduce the file footprint. However, doing this to larger-sized components can make maintaining the code challenging. The last thing developers want to do is debug a component with 1000+ lines of code with intermingling logic.
Pros and cons of combining all logic into a single component:
- 🟢 Less file footprint
- 🟢 Easier to write
- 🟢 Less problem with reactivity
- ❌ No clear separation of logics
- ❌ Harder to debug when things go wrong
- ❌ Adding more features to this component can be challenging
Consider splitting your component's logic when:
- The file has reached 100+ lines of code
- The component has two or more sources of data (e.g. route params and API)
- UI has many fields that need to be populated from a data source
- When it is not clear which data source drives the UI or when you want to abstract it out
How to separate the logic?
constructor(
  private route: ActivatedRoute,
  private apiService: ApiService,
) {}

ngOnInit() {
  this.route.params.pipe(
    takeUntil(this.ngDestroy$),
    switchMap(params => this.apiService.load1(params.id)),
  ).subscribe(response => {
    this.processApi(response);
  });
}

processApi(payload: ApiPayload1) {
  const calculatedData = this.calculate(payload);
  this.title = calculatedData.title;
  this.sumAmount = calculatedData.sum;
}

private calculate(...): ComponentData {
  // Calculate implementation
}
Figure: Massive amount of code intermingling from API calls to calculation to UI binding
Here are the steps to split the logic:
-
Group front-end logic into these processes:
- Data fetching: fetching data from external sources
- Data processing: processing source data to suit the UI better
- Data display: binding the UI displayed element to a value
- Identify which part of a smart component belongs to which process.
-
Use declarative code for UI data binding.
Use
ObservableandBehaviorSubject(orSignal, but this is still in developer preview) to bind value to UI elements. This will help us remove the need to imperatively notify the UI to re-render when the source value has changed.calculatedData$ = new BehaviorSubject<CalculatedData | null>(null); constructor( private route: ActivatedRoute, private apiService: ApiService, ) {} ngOnInit() { this.route.params.pipe( takeUntil(this.ngDestroy$), switchMap(params => this.apiService.load1(params.id)), ).subscribe(response => { this.calculatedData$.next(this.calculate(payload)); }); // UI Binding logic this.calculatedData$.pipe( takeUntil(this.ngDestroy$), ).subscribe(calculatedData => { this.title = calculatedData.title; this.sumAmount = calculatedData.sum; }); } private calculate(...): ComponentData { // Calculate implementation }Figure: Use declarative code to bind UI value
-
Split data display process.
This gives the most benefit since having the view logic separate allows developers to easily swap out any UI elements, which is one of the frequent things to change in the front end. One approach is to create a sidecar service for this component.
// ComponentService ================
constructor(
  private apiService: ApiService,
) {}

private _componentData$ = new BehaviourSubject<ComponentData|null>(null);
public componentData$ = this._componentData$.asObservable();

public initialiseComponentData(paramId: string): void {
  this.apiService.load1(params.id).subscribe(response => {
    this._componentData.next(this.calculate(payload));
  });
}

private calculate(...): ComponentData {
  // Calculate implementation
}

// Component ================
constructor(
  private route: ActivatedRoute,
  private componentService: ComponentService,
) {}

ngOnInit() {
  // API Fetching logic
  this.route.params.pipe(
    takeUntil(this.ngDestroy$),
  ).subscribe(params => {
    this.componentService.initialiseComponentData(params.id);
  });

  // UI Binding logic
  this.componentService.calculatedData$.pipe(
    takeUntil(this.ngDestroy$),
  ).subscribe(calculatedData => {
    this.title = calculatedData.title;
    this.sumAmount = calculatedData.sum;
  });
}
Figure: UI logic is separated from Data Fetching and Data Processing logic
-
(Optional) If the component is complex enough, consider splitting the data fetching with the data processing step to another component.
In the example below, we create a parent component to handle the routing while providing the child component with the only necessary data.
// ComponentService ================
// ...Same implementation as above...

// ParentComponent ================
constructor(
  private route: ActivatedRoute,
  private componentService: ComponentService,
) {}

ngOnInit() {
  // API Fetching logic
  this.route.params.pipe(
    takeUntil(this.ngDestroy$),
  ).subscribe(params => {
    this.componentService.initialiseComponentData(params.id);
  });
}

// Component ================
constructor(
  private componentService: ComponentService,
) {}

ngOnInit() {
  // UI Binding logic
  this.componentService.calculatedData$.pipe(
    takeUntil(this.ngDestroy$),
  ).subscribe(calculatedData => {
    this.title = calculatedData.title;
    this.sumAmount = calculatedData.sum;
  });
}
Figure: All logics (data fetching, data processing, and data display) are now separated